Doom on the GitHub Universe Conference Badge with Copilot
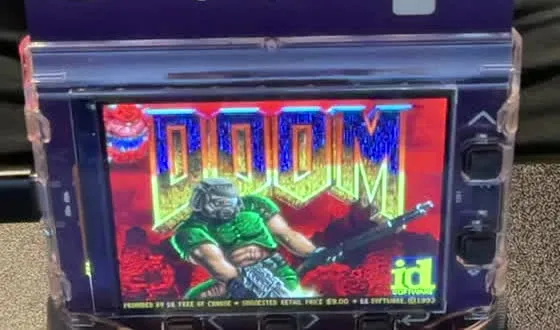
It is a law of the universe that if a device has a screen and a few buttons, somebody will eventually make it run Doom. So when Charlie Birks shared a Doom firmware image for last year’s conference badge, I had to get it running on the new GitHub Universe 2026 badge with those fancy capacitive gaming controls.
There was just one small problem. Charlie’s image didn’t work on the new badge and I always get scared of running writing raw C in the pico-sdk.
This is the story of how GitHub Copilot and I got it working in about 47 minutes late one evening while I was also working on my GitHub Universe keynote.
But it’s really a story about something bigger. The most interesting part wasn’t the code Copilot wrote. It was the way it kept building itself new ways to check its own work.
Creating a self-verification loop is what gives your agents super powers
I mentioned some of the tricks I used to a few buddies at Universe and they seemed to find them interesting. Some of it was even novel to Simon Willison and so I figured it would be worth a write up about how the port went and what we did. Also, with 20/20 hindsight what I probably should have done differently. When I started this I’d no idea if Copilot would be able to do what I needed - but given it worked like a champ, how should I do this differently next time and how would be reduce the costs of doing it.
The setup
The Universe 2026 badge is a lovely bit of kit: an RP2350B microcontroller, a 320x240 ST7789 screen, CAP1208 capacitive touch pads, an LSM6DS3TR-C accelerometer and a handful of physical buttons, all running MicroPython out of the box.
Charlie’s Doom image was designed for the Pimoroni Tufty 2350. Under the hood it was Daft-Freak/rp2040-doom running on top of the 32blit SDK.
It was late at night when I had the ‘I wonder if Copilot can do this’ thought. So I just fired up the GitHub Copilot app, created a worktree of the badge repo, picked Claude Opus 5.5 as the model (because if you can’t bring out the big guns for Doom when can you bring them), flipped it into autopilot mode, plugged in a badge running the stock firmware and typed this (typos and all):
Get the latest from upstream then crack open the doom port in /Users/martin/Downloads/tufty_doom_universe25.uf2. It is a RP2350 firmware image. It’s based on Daft-Freak/rp2040-doom but ported to work on the Universe badge.
I want to come up with a plan on how to fix the button mappings to support up/down/left/right and fire. Once that is working, then I want to support flipping the screen 180 degrees when the accelerometer detects you have the card upside down. Then finally want to get the capacaitive game controls working (up/down/left/right and select for fire)
Wonderfully a plan came back that seemed to make a lot of sense so I pulled the trigger on implementing it:
create a fork in my martinwoodward repo and use that. Home short/long press good until touch works. Lets get it working and tested and then I’ll contact the author to see if he wants a patch upstream. Connected a board running the stock firmware so you can use the REPL to query what you need
That last sentence turned out to be the most important thing I typed all evening.
What did it cost?
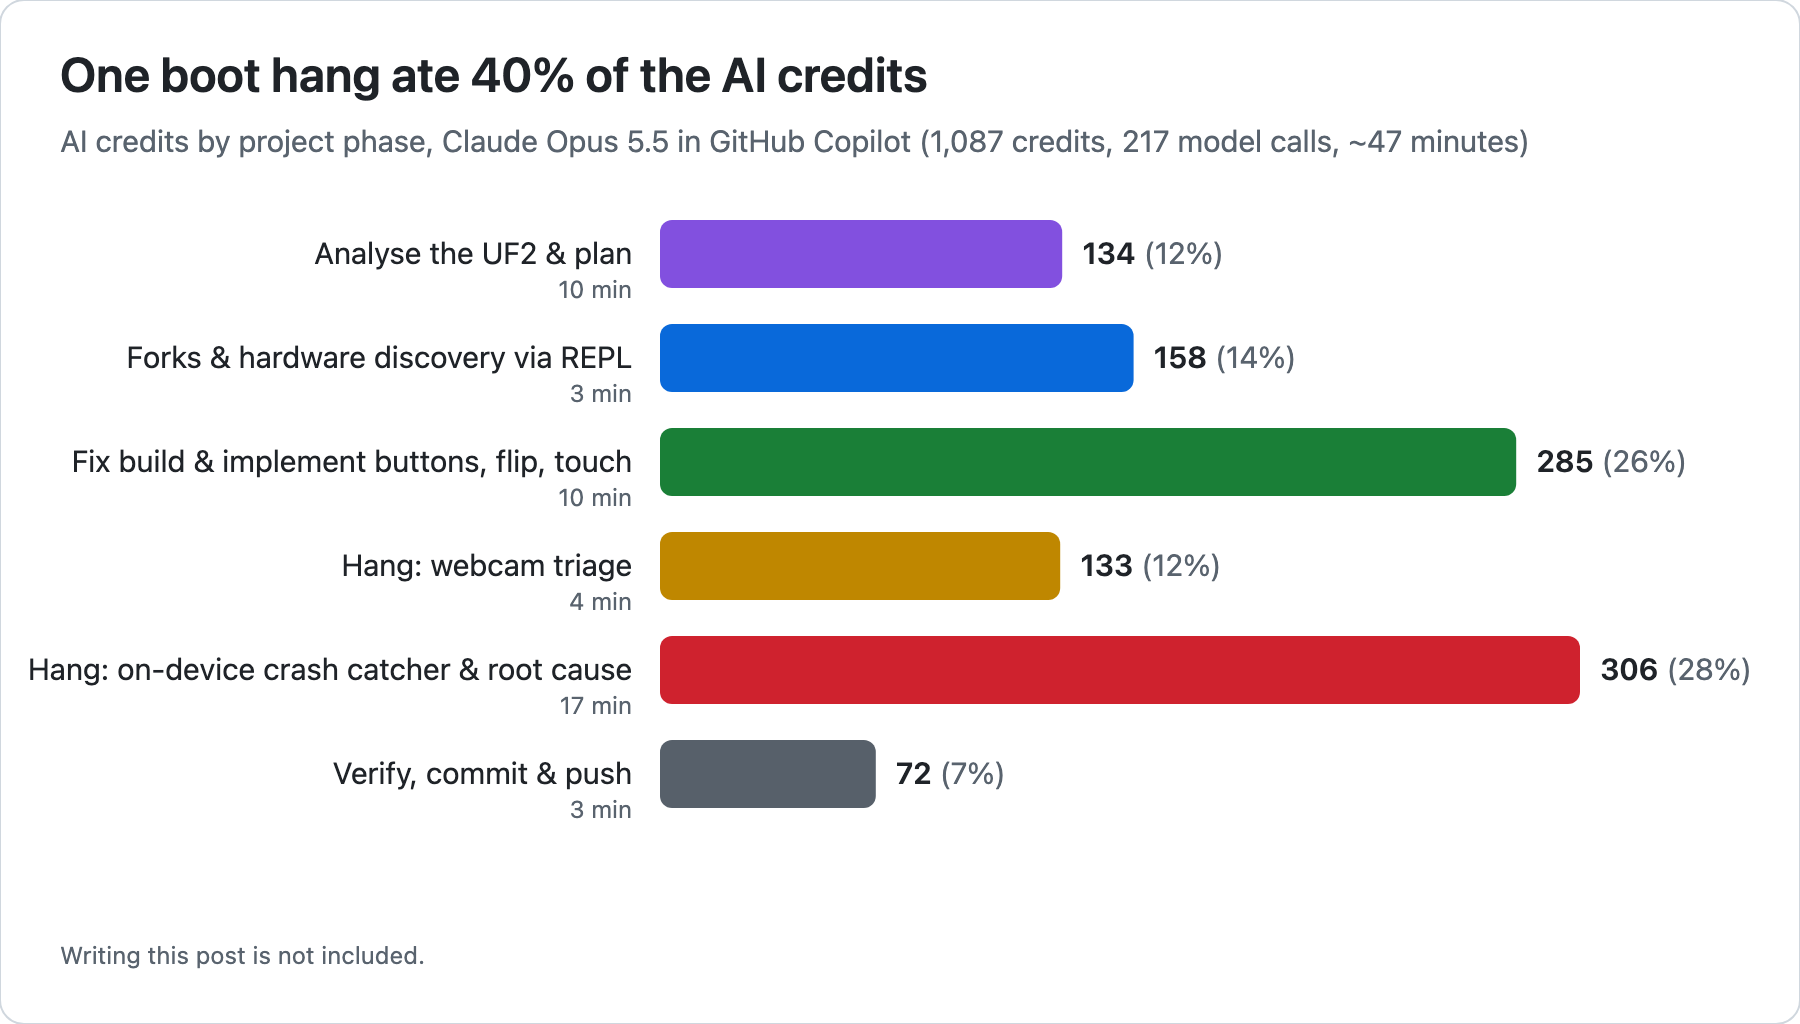
Before we get into the details, a question I get asked a lot: how much does something like this actually cost? The whole task, start to finish, came to about 1,087 AI credits across 217 model calls with Claude Opus 5.5, in about 47 minutes of wall-clock time. Where 1 AI credit roughly equals $0.01 USD retail, out of plan - so $10.87
Here’s how that broke down by phase of the project:
| Phase | Credits | Share | Time |
|---|---|---|---|
| Analyse the UF2 & plan | 134 | 12% | ~10 min |
| Forks & hardware discovery via the REPL | 158 | 14% | ~3 min |
| Fix the build & implement buttons, flip, touch | 285 | 26% | ~10 min |
| Hang: webcam triage | 133 | 12% | ~4 min |
| Hang: on-device crash catcher & root cause | 306 | 28% | ~17 min |
| Verify, commit & push | 72 | 7% | ~3 min |
The thing that jumps out is that actually implementing the features I asked for was only about a quarter of the cost. One boot hang took about 40% of the credits. Which, if you’ve ever done embedded development, will feel very familiar. The bug always takes longer than the feature.
Step 1: Reverse engineering the firmware
A UF2 file is just a firmware image chopped into 512-byte blocks so that you can drag it onto a microcontroller that’s pretending to be a USB stick. Copilot unpacked the 2.4 MB image and parsed the pico-sdk binary_info block that’s embedded in it. That told it the board was pimoroni_tufty2350, built with pico-sdk 2.2.0, and there were 32blit SDK strings all over the place. From that it worked out that this was the blit branch of rp2040-doom running on the 32blit SDK’s 32blit-pico target.
Then it went looking for the button table and found it sitting in the binary:
UP=10, DOWN=6, A=7, B=8, X=9, HOME=22, everything else unsetThat’s the old Tufty pin map, which explained why the controls were all wrong. Even better, GPIO8 is the PSRAM chip-select on the new badge, so “press B” was effectively poking the memory chip. 😬
Copilot then read the upstream Doom sources to see how 32blit buttons map to Doom keys (D-pad to arrow keys, A to fire, B to use, Y to automap, MENU to Escape) and wrote up a three-phase plan: buttons, then screen flip, then touch.
Step 2: Ask the hardware, don’t guess
This is where things got interesting. Rather than guessing at pin numbers from a schematic, Copilot used mpremote to talk to the stock MicroPython REPL on the badge plugged into my laptop, and simply asked the hardware.
It read the machine.Pin.board names to confirm the real pin map: UP=GPIO11, DOWN=6, LEFT=7, RIGHT=9, SELECT=10 and HOME=22, all active-low with pull-ups. It scanned the internal I2C bus (i2c1 on GPIO18/19) and found the CAP1208 touch controller at 0x28 and the IMU at 0x6A.
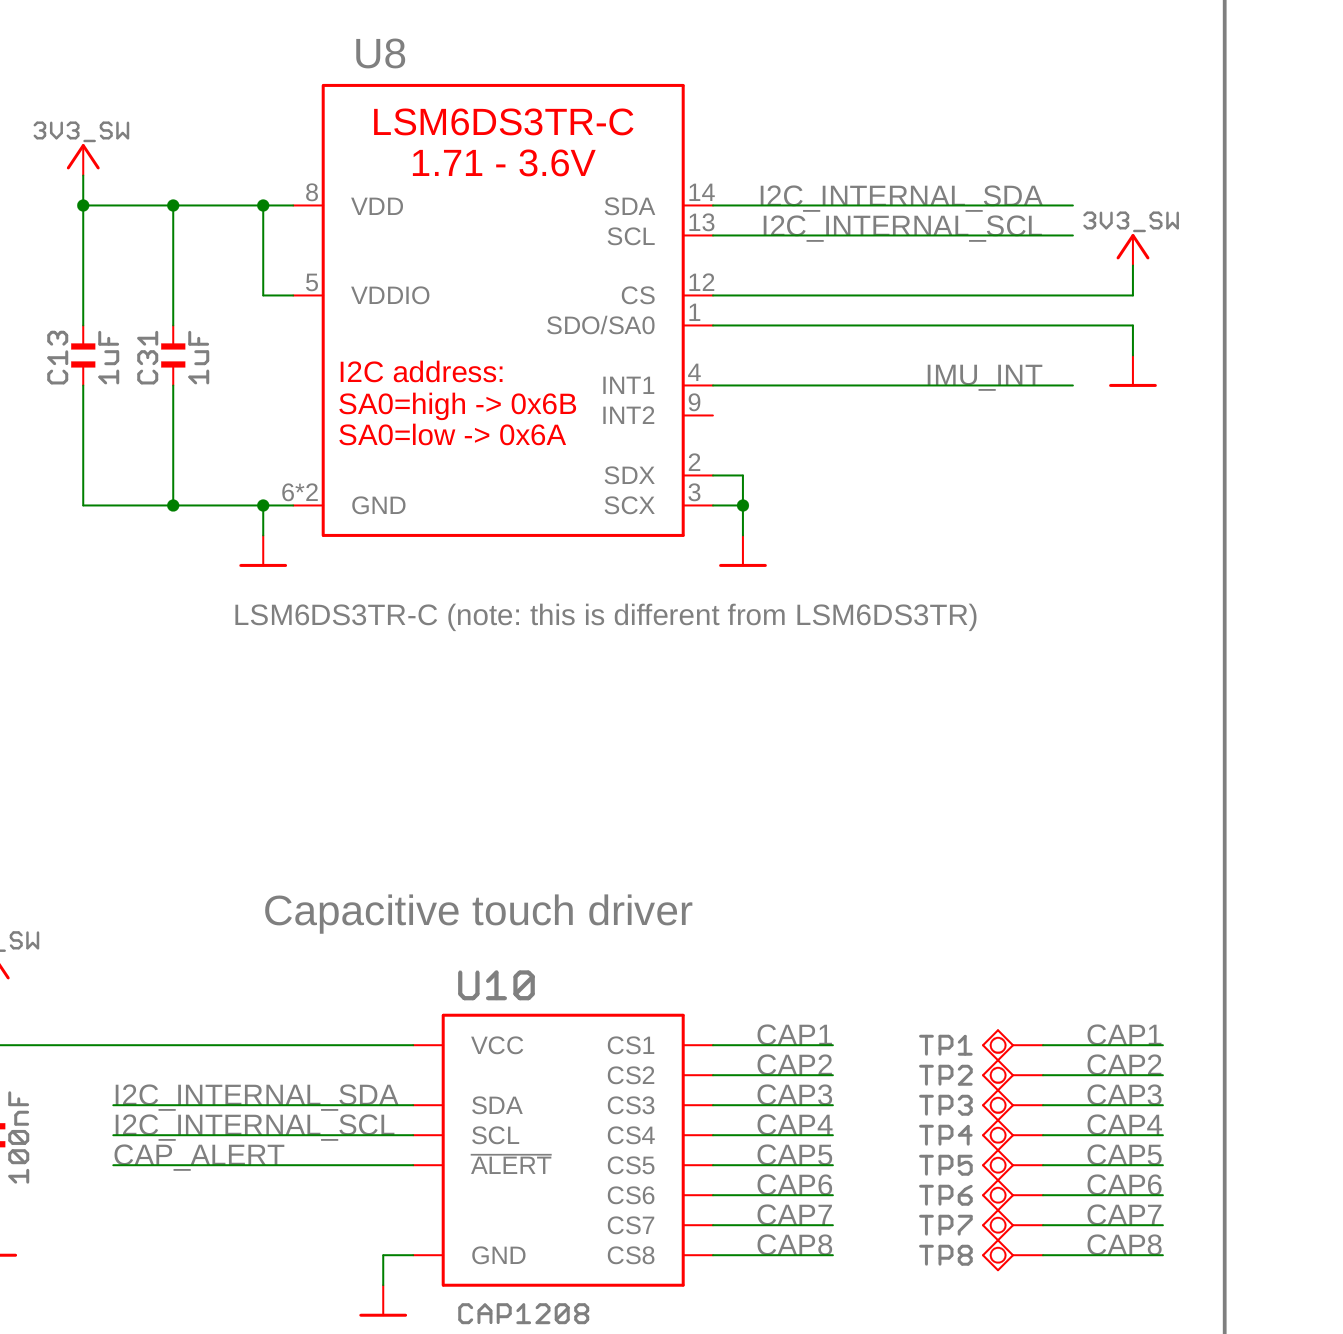
It then dumped the CAP1208’s registers so it could copy the stock firmware’s sensitivity and threshold settings, and poked around inside the stock firmware’s badge object to work out which touch channel was which (bits 0 to 7 are Up, Right, Down, Left, Menu, Home, Select and Back). It also read what the stock firmware considers “upright” from the accelerometer: (0, 16384, 0).
Then it asked me to turn the badge upside down so it could take another reading. I did, and got back about (1070, -15466, -5335). Negative Y means upside down. Lovely.
None of this required me to know anything about the board. The device told the agent everything it needed, and the agent could check its assumptions against reality rather than against what it thought the hardware looked like.
Step 3: Forks, builds and features
Copilot forked rp2040-doom and the 32blit SDK into my account on a universe2026 branch, installed the Arm GNU toolchain and pico-sdk 2.2.0, and kicked off a build.
Which promptly failed. CMake couldn’t find the board definition, and once that was sorted, some pico-sdk-only settings were leaking into the 32blit build. Two PICO_SDK AND NOT 32BLIT_SDK guards in Doom’s CMake fixed that.
Then it implemented all three phases in one go:
- A new 32blit board,
github_badge2026, with the correct pins. - A new
badge2026input driver that talks to the IMU and the CAP1208 over I2C. - Upside-down detection. If
|y| > |z|andy < -6000, with a 300 ms debounce, the badge is upside down. It flips the display 180° at runtime by changing the ST7789’sMADCTLregister between frames, and swaps the D-pad around so the controls follow the screen. - Touch controls. The touch D-pad moves you around, Select fires, Back opens doors, Menu brings up the menu and the Home pad shows the automap.
- Home button. Short press for “use”, long press for the menu, as a fallback until touch was working.
- Power management that works without the Tufty’s RTC chip, which the new badge doesn’t have.
It built. It flashed. The badge enumerated over USB as “GitHub Universe 2026 Badge”. Job done?
Step 4: It hung
Nope. The badge sat on the DOOM title screen, then quietly disappeared from USB.
I rebooted the badge but seems to be hung on the splash screen
And this is the moment where an agent usually gets stuck. The USB serial connection died with the hang, so there were no logs. There was no debug probe attached. As far as Copilot was concerned, the device had just gone dark.
Step 5: Giving the agent eyes
So I had an idea:
If you open the webcam on this laptop I can have the badge in front of it so you can take a look
Copilot used ffmpeg -f avfoundation to grab frames from my laptop webcam and then looked at the images itself. The first few were mostly my shirt, then the ceiling. (“Try again.” “Try now.” “And again.”) Eventually I got the angle right and it could see the problem with its own eyes:
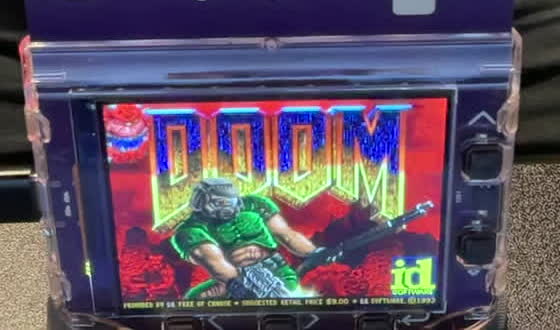
Frozen on the title screen. With USB gone, that webcam was the agent’s only window into what the device was doing.
Step 6: Giving the agent a voice
The badge was propped up at an angle where I couldn’t easily see my laptop screen and the badge at the same time. Also - I was busy working on my keynote demo on another laptop. I needed a way to help Copilot make me a better meat proxy. So I asked:
speak when you need me to do something as the screen is at an angle that is hard to see
From then on, Copilot used the macOS say command to call out to me whenever it needed a pair of hands. “Please hold the Home button and tap reset” to get into the BOOTSEL bootloader. “Please hold the badge up to the camera.” It also wrote itself a little flashwait.sh script that waited for the RP2350’s boot drive to appear, copied the new UF2 over and then announced out loud that it was done.
Later on Copilot got bored of waiting on me and actually worked out how to stop needing me at all for flashing. Turns out the pico-sdk has a “magic baud rate” trick: open the USB serial port at 1200 baud and the board reboots into the bootloader. So as long as the firmware was alive enough to have a serial port, Copilot could flash it on its own.
It’s a small thing, but it felt like a genuine collaboration. I was the hands. The agent was the brain (and, thanks to the webcam, also the eyes).
Step 7: Building its own diagnostic tool
Watching a frozen screen only tells you that it crashed, not why. With no debugger and USB dying, Copilot did what a good embedded engineer would do. It built a crash catcher into the firmware itself.
Behind a new CMake option, DOOM_HANG_DEBUG, it:
- Overrode the Cortex-M33 HardFault handler.
- Added a watchdog, fed by “heartbeat” phase markers sprinkled through Doom’s main loop.
- On a fault or a hang, saved the key registers (PC, LR, CFSR, xPSR, BFAR, SP) plus the last heartbeat phase into the RP2350’s power-manager scratch registers, which survive a reboot.
- Rebooted, and on the next boot, instead of running Doom, drew the crash report on the screen and printed it over USB serial tagged
DOOMDBG.
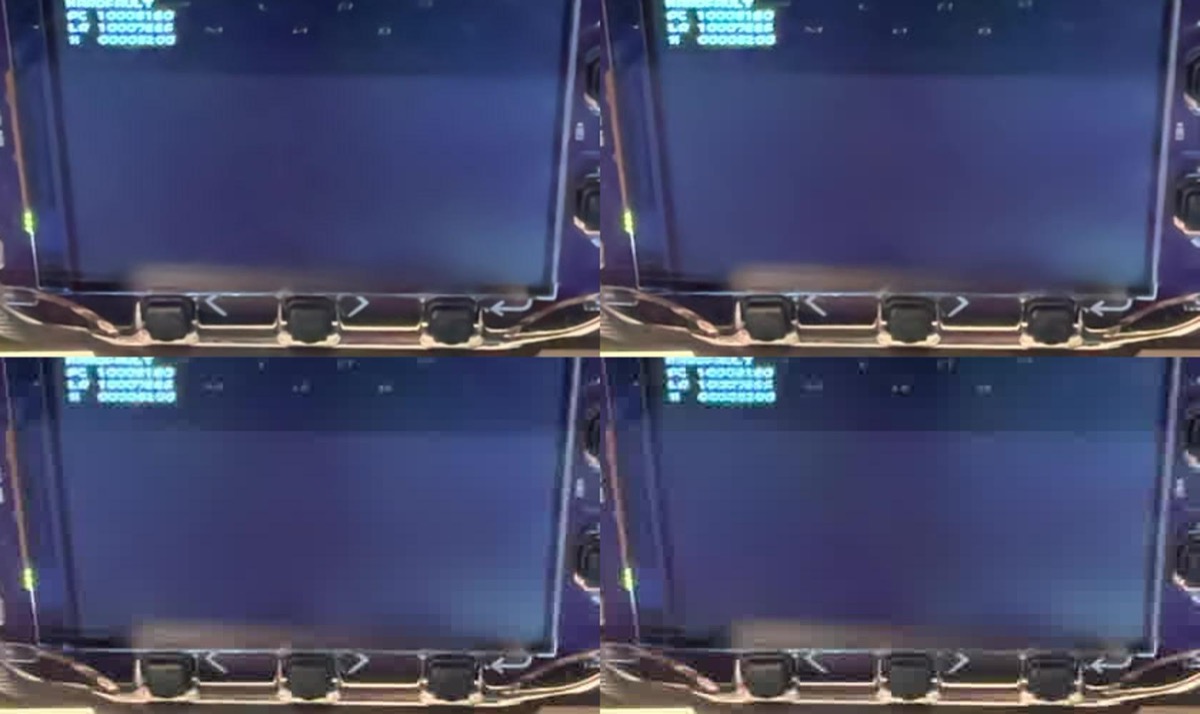
The first version drew text that was far too small for the webcam to read:
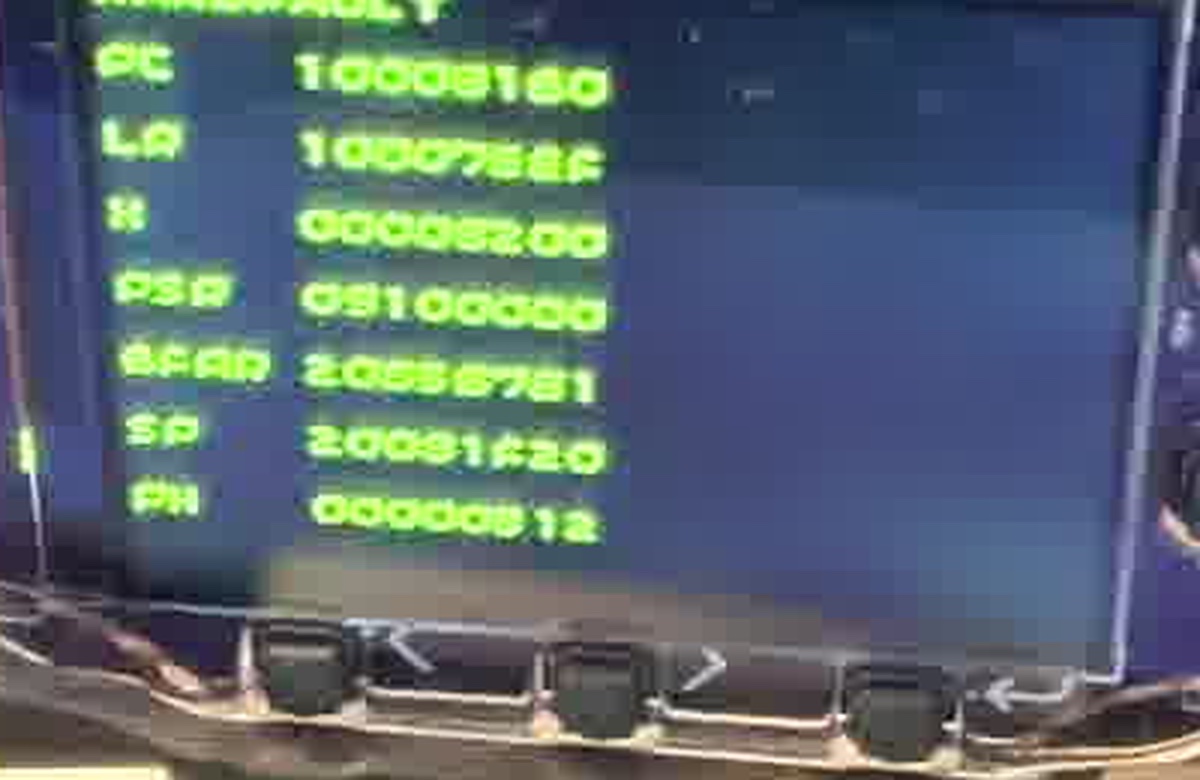
So Copilot changed it to 2x scaled yellow text. Better, but still pretty blurry through a laptop webcam:
Then I noticed something. The screen was flashing. The badge was reboot-looping, even in report mode where Doom doesn’t run at all. That was a huge clue: the bug wasn’t in Doom. It was in the platform code underneath it.
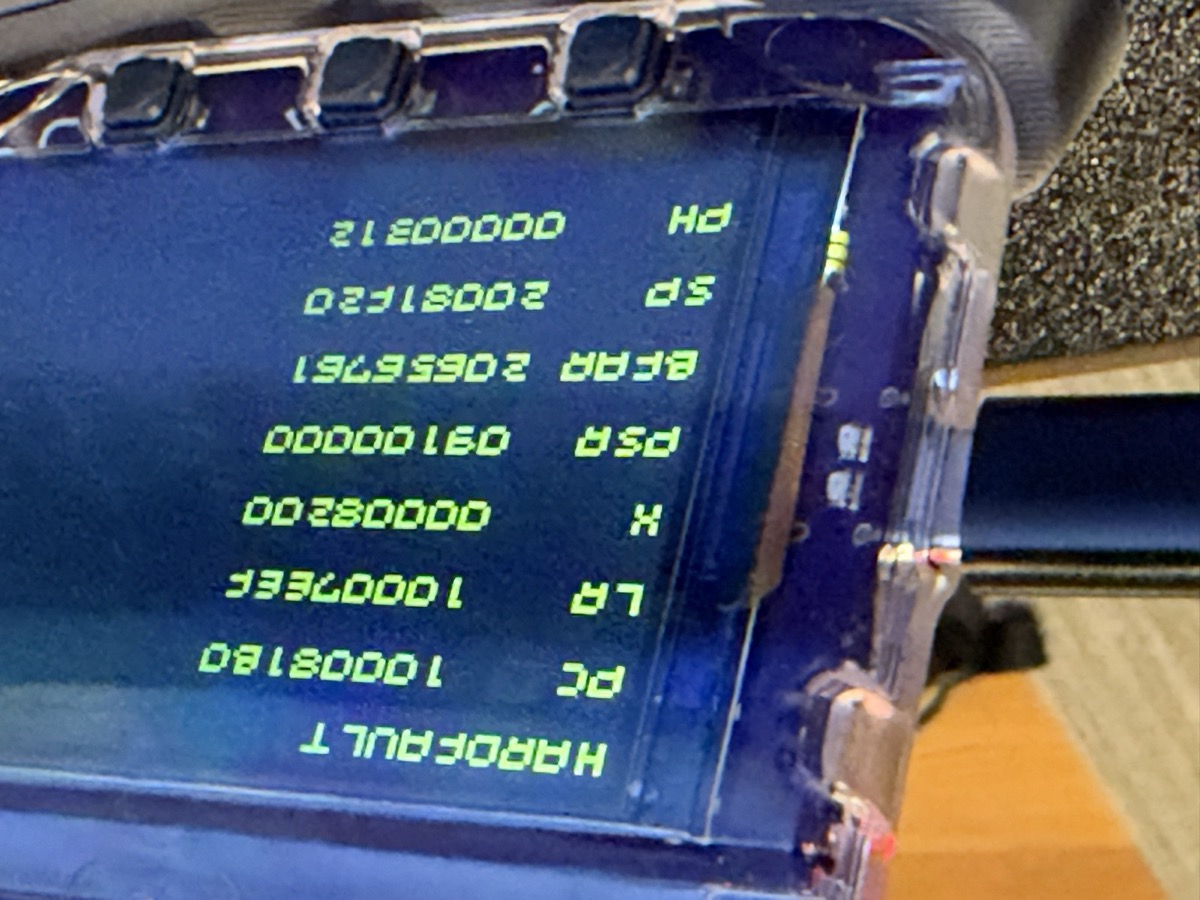
Finally, I gave up on the webcam, took a photo with my phone and AirDropped it to ~/Downloads. Copilot picked it up from there:
Step 8: Finding the bug
This is the bit where I sat back and enjoyed watching the detective work.
- PC
0x10008180pointed into a literal pool. In other words, the CPU was trying to execute data. Something had trampled memory. - CFSR
0x8200decoded as a precise bus fault with a valid fault address. - LR
0x10007EEF, looked up against the ELF symbols, landed just afterhw_endpoint_xfer_startin TinyUSB’sdcd_edpt_xfer. So we were in the USB device stack. - BFAR
0x20656761was the killer clue. Read it as little-endian bytes and it’s the ASCII string"age ". A fragment of a string had been loaded and used as a pointer. - And the hang always came about five seconds after boot. Which is exactly when macOS mounts the badge’s USB mass-storage drive.
So Copilot went looking for strings ending in “age” in the USB code, and found it. In 32blit-pico’s tud_msc_inquiry_cb, the product name was being memcpy’d into the SCSI INQUIRY product_id field like this:
USB_PRODUCT_STR " Storage"The product_id field is only 16 bytes. Our new product name made that "Universe 2026 Badge Storage", which is 27 bytes. The copy ran straight off the end and corrupted TinyUSB’s internal state, and the next time USB tried to use it… boom.
Here’s the best bit. The original Tufty name, "Tufty 2350 Storage", overflows too. But only by 2 bytes, which happened to land somewhere harmless. It was a latent bug in upstream code that had been sitting there quietly, waiting for somebody to give their badge a longer name.
The fix was simply to clamp the copy and space-pad the fields like the SCSI spec expects. Here’s the change to 32blit-pico/usb/device.cpp:
-  memcpy(vendor_id  , vid, strlen(vid));
-  memcpy(product_id , pid, strlen(pid));
-  memcpy(product_rev, rev, strlen(rev));
+  // fixed-size, space padded fields, don't overflow if the strings are too long
+  auto copy_field = [](uint8_t *out, const char *str, size_t len) {
+    size_t str_len = std::min(strlen(str), len);
+    memcpy(out, str, str_len);
+    memset(out + str_len, ' ', len - str_len);
+  };
+
+  copy_field(vendor_id, vid, 8);
+  copy_field(product_id, pid, 16);
+  copy_field(product_rev, rev, 4);
Reflash, and:
Seems to be running!
No more crashes, and both USB serial and the storage drive stayed up.
After all that, the hardest bug of the evening wasn’t in Doom at all. It was a one-line buffer overflow in somebody else’s USB code.
Step 9: Wrapping up
Copilot rebuilt the release firmware with the crash catcher turned off, flashed it itself using the 1200 baud trick, checked it stayed up for over 30 seconds with serial and the storage volume mounted, and committed everything to the universe2026 branches of my forks.
pico: don't overflow MSC inquiry fields with long USB strings(an upstreamable bug fix)pico: skip init for undefined GPIO buttonspico: add GitHub Universe 2026 badge board
In martinwoodward/rp2040-doom:
- The CMake guards
- Home button short/long press
- The optional
DOOM_HANG_DEBUGcrash catcher, in its own commit so it can easily be dropped if the upstream maintainers don’t want it
Next up, I’ll be reaching out to the original authors to see if they’d like the patches upstream. That MSC overflow fix in particular is one that anybody building a 32blit-pico device with a longer product name will want.
But if you want to try Doom in the badge virtually, you can try it here.
Try entering partymarty after the game has started for
invulnerability plus all the guns and ammo.
What I’d do differently to spend fewer credits
Let’s be honest up front: about 1,087 credits ($10) for roughly 47 minutes of reverse engineering, embedded development and crash debugging is cheap. Tracking down that hang was genuinely investigative work, and no prompt could have told the agent the answer in advance. But looking back at the session, there are definitely things I could have done to spend fewer credits getting there.
1. Front-load the context and constraints. My first prompt asked Copilot to “crack open” a UF2 binary. Analysis and planning cost 134 credits (12%), and some of that went on reverse engineering things that were already sitting in source code on GitHub. If I’d pointed it straight at the blit branch of rp2040-doom, the 32blit SDK and the badge hardware docs, it could have skipped a lot of that. Worse, several key facts only turned up in my second message: fork into my account, Home short/long press is fine until touch works, there’s a badge running the stock firmware on the REPL, and no backup is needed. The agent had already planned without those constraints, and then had to re-plan.
2. Set up the self-verification loop at the start, not mid-crisis. The hang ate 439 credits, about 40% of the total. The webcam, say and the on-device crash catcher were all invented reactively, after things had already gone wrong. If my first prompt had said “you can use the webcam to see the badge, use say when you need me, and build in a crash-report path before you flash anything”, that first failed boot would have been diagnosable straight away. Which is really the whole point of this post.
3. Avoid short nudge prompts in a long session. “Try again”, “Try nw” and “And again” each cost a full model turn. And because every turn re-reads the whole conversation history, turns later in a long session cost more than early ones. It would have been better to let the agent own the retry loop (“grab a webcam frame every few seconds until you can see the screen, and call me with say if you need me to move it”), or to give richer feedback in a single message.
4. Split long work into phases or sessions. I did everything in one continuous session, so the entire history (UF2 analysis, REPL dumps, build logs) was carried along into the hang debugging and then on into writing this blog post. Starting a fresh session for each phase with a short handoff summary, or compacting the context earlier, would have kept the cost of each turn down.
5. Match the model to the job. All 217 calls ran on Claude Opus 5.5. Mechanical steps like builds, flashing, committing and pushing, and REPL queries could have gone to a cheaper, faster model or to sub-agents. I’d keep the premium model for the reasoning-heavy root-cause work, where it absolutely earned its keep. Spotting that BFAR was the string "age " is not something I’d trust to a lightweight model.
6. Anticipate the human-in-the-loop steps. Taking the upside-down accelerometer reading needed a separate round trip. If I’d said up front “I’ll hold it upside down whenever you ask”, or just given it both readings, that would have saved a turn.
Putting all of that together, here’s roughly the first prompt I should have written:
Port Doom to the GitHub Universe 2026 badge. The existing port for last year’s Tufty 2350-based badge is the
blitbranch of Daft-Freak/rp2040-doom on top of 32blit/32blit-sdk’s 32blit-pico target. Fork both into martinwoodward and work on auniverse2026branch. No backup of the badge is needed.Goals, in order: fix the button mappings (up/down/left/right and fire; Home short press = use and long press = menu is fine until touch works), flip the screen 180° when the accelerometer says the badge is upside down, then get the capacitive touch pads working (D-pad to move, Select to fire).
A badge running the stock MicroPython firmware is connected over USB: use the REPL to query pins, I2C devices and registers rather than guessing. I’ll hold it upside down for an accelerometer reading when you ask.
Before flashing anything, add an opt-in crash reporter that survives a reboot and shows its report on screen and over serial. You can use the laptop webcam to see the badge screen, use the 1200 baud reset to get into the bootloader, and use
sayto call me whenever you need me to press something. Use a cheaper model or sub-agents for builds, flashing and git.
None of these would have made the bug go away. But I suspect they’d have got us to “Seems to be running!” with noticeably fewer credits and fewer “Try again”s.
Reflections
I’ve been building with Copilot since the very beginning, but this session really changed how I think about working with agents on hardware.
Look back at what actually unlocked progress at each step. It was never “the model wrote better code”. It was every time the agent got a new way to see whether what it had done was right:
- The REPL let it ask the real hardware for pins, I2C addresses, register values and accelerometer readings instead of guessing.
- The webcam gave it eyes when USB went dark.
saygave it a way to call a human when it needed hands.- The on-device crash reporter turned a frozen screen into a set of registers it could reason about.
- Auto-flashing with the 1200 baud trick let it close the build, flash and test loop without me.
Each of those loops let the agent check its own work and narrow down the problem. That’s the bit that turned a frustrating “it’s hung” into a precise one-line fix in under an hour.
Creating a self-verification loop is what gives your agents super powers
And it was a lot of fun. I held the badge up to the camera, I flipped a badge upside down on request. The agent did the reverse engineering, the register decoding and the detective work. Together we got Doom running on a conference badge, and found a bug that had been hiding in plain sight for a year.
Now if you’ll excuse me, I have some demons to frag.