VibeCodr: The Ultimate Vibe Coding Accessory
Say Hello to VibeCodr, the ultimate vibe coding accessory designed to enhance your programming flow and productivity. This project combines hardware and vibe coded software to create a unique experience that brings joy with every press.
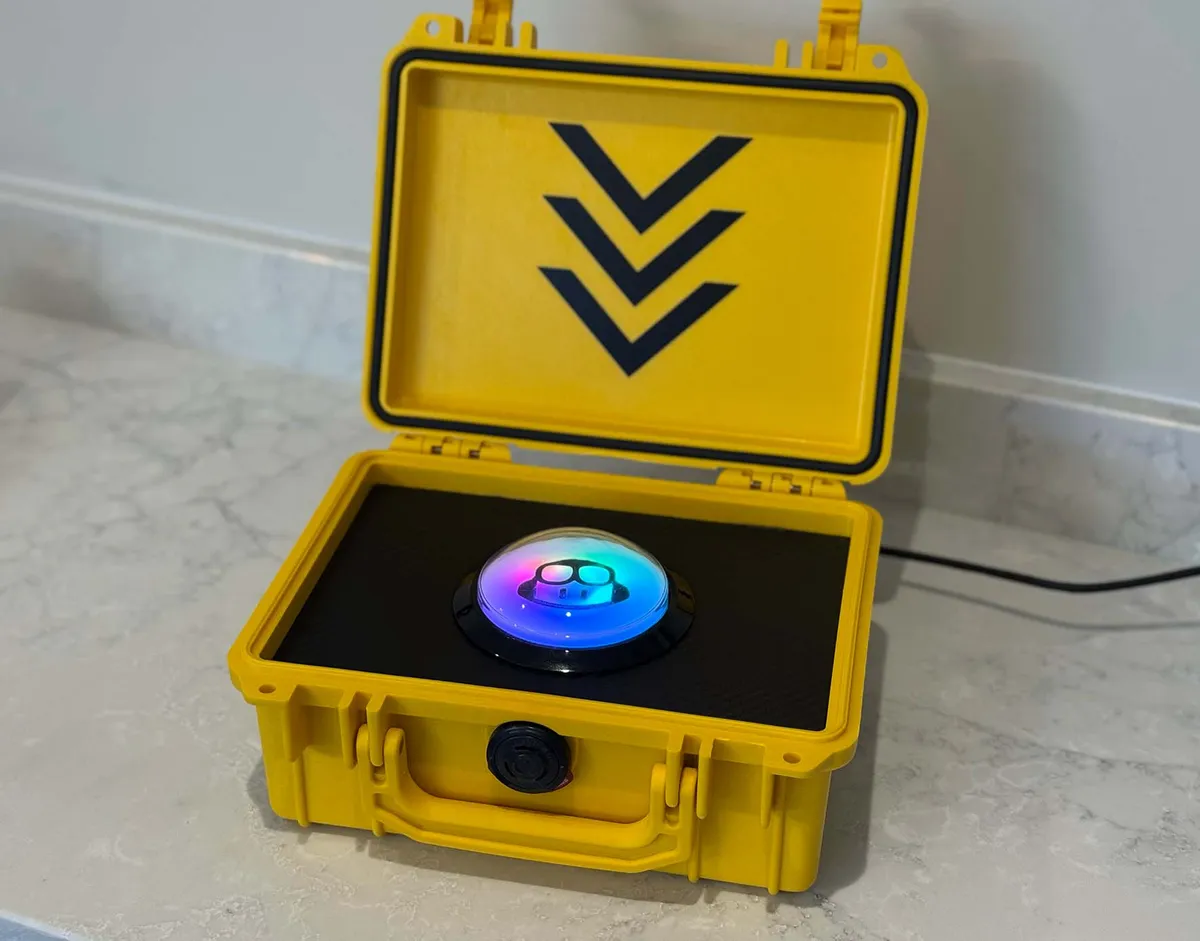
I wanted to have a bit of fun with the vibe coding trend, so I built a big shiny button that lights up when you press it and emulates a keyboard key press. At some of the GitHub shows this year I wanted to have some fun so we have this to compliment a Coplot Spin Wheel which is used to help up randomly distribute swag from the stock we have at that event without it turning into a scrum.
Hardware Requirements
- Pelican 1150 (Yellow) - [US] [UK]
- 100mm Push Button Arcade Switch (White) - [US] [UK]
- 12 Segment RGB WS2812 / 5050 LED Ring - [US] [UK]
- Plasma 2040 W - [US] [UK]
- USB C Panel Mount - [US] [UK]
- USB C to Micro-USB Convertor - [US] [UK]
- Carbon Fiber Vinyl Wrap - [US] [UK]
Build Instructions
Prepare the Pelican Case
Remove all stickers (and any foam inserts) from the Pelican 1150 case. I found the stickers came off pretty well but you might need some isopropyl alcohol to remove the sticky residue.
Install the USB C Panel Mount
Drill a hole in the back of thePelican case to fit the USB C panel mount. This is used to pass the USB C cable through the case into the Raspberry Pi Pico board.
Apply decals
I used my Cricut Maker to cut out some vinyl decals to apply to the case. I used black vinyl and made use of transfer tape to apply them smoothly. You can get the decal images from the repo. Easiest thing is to import the PDF into Cricut Design Space as it keeps the sizes correct but I’ve also include the SVG file in case you want to make some changes. You should then have something that looks like this. 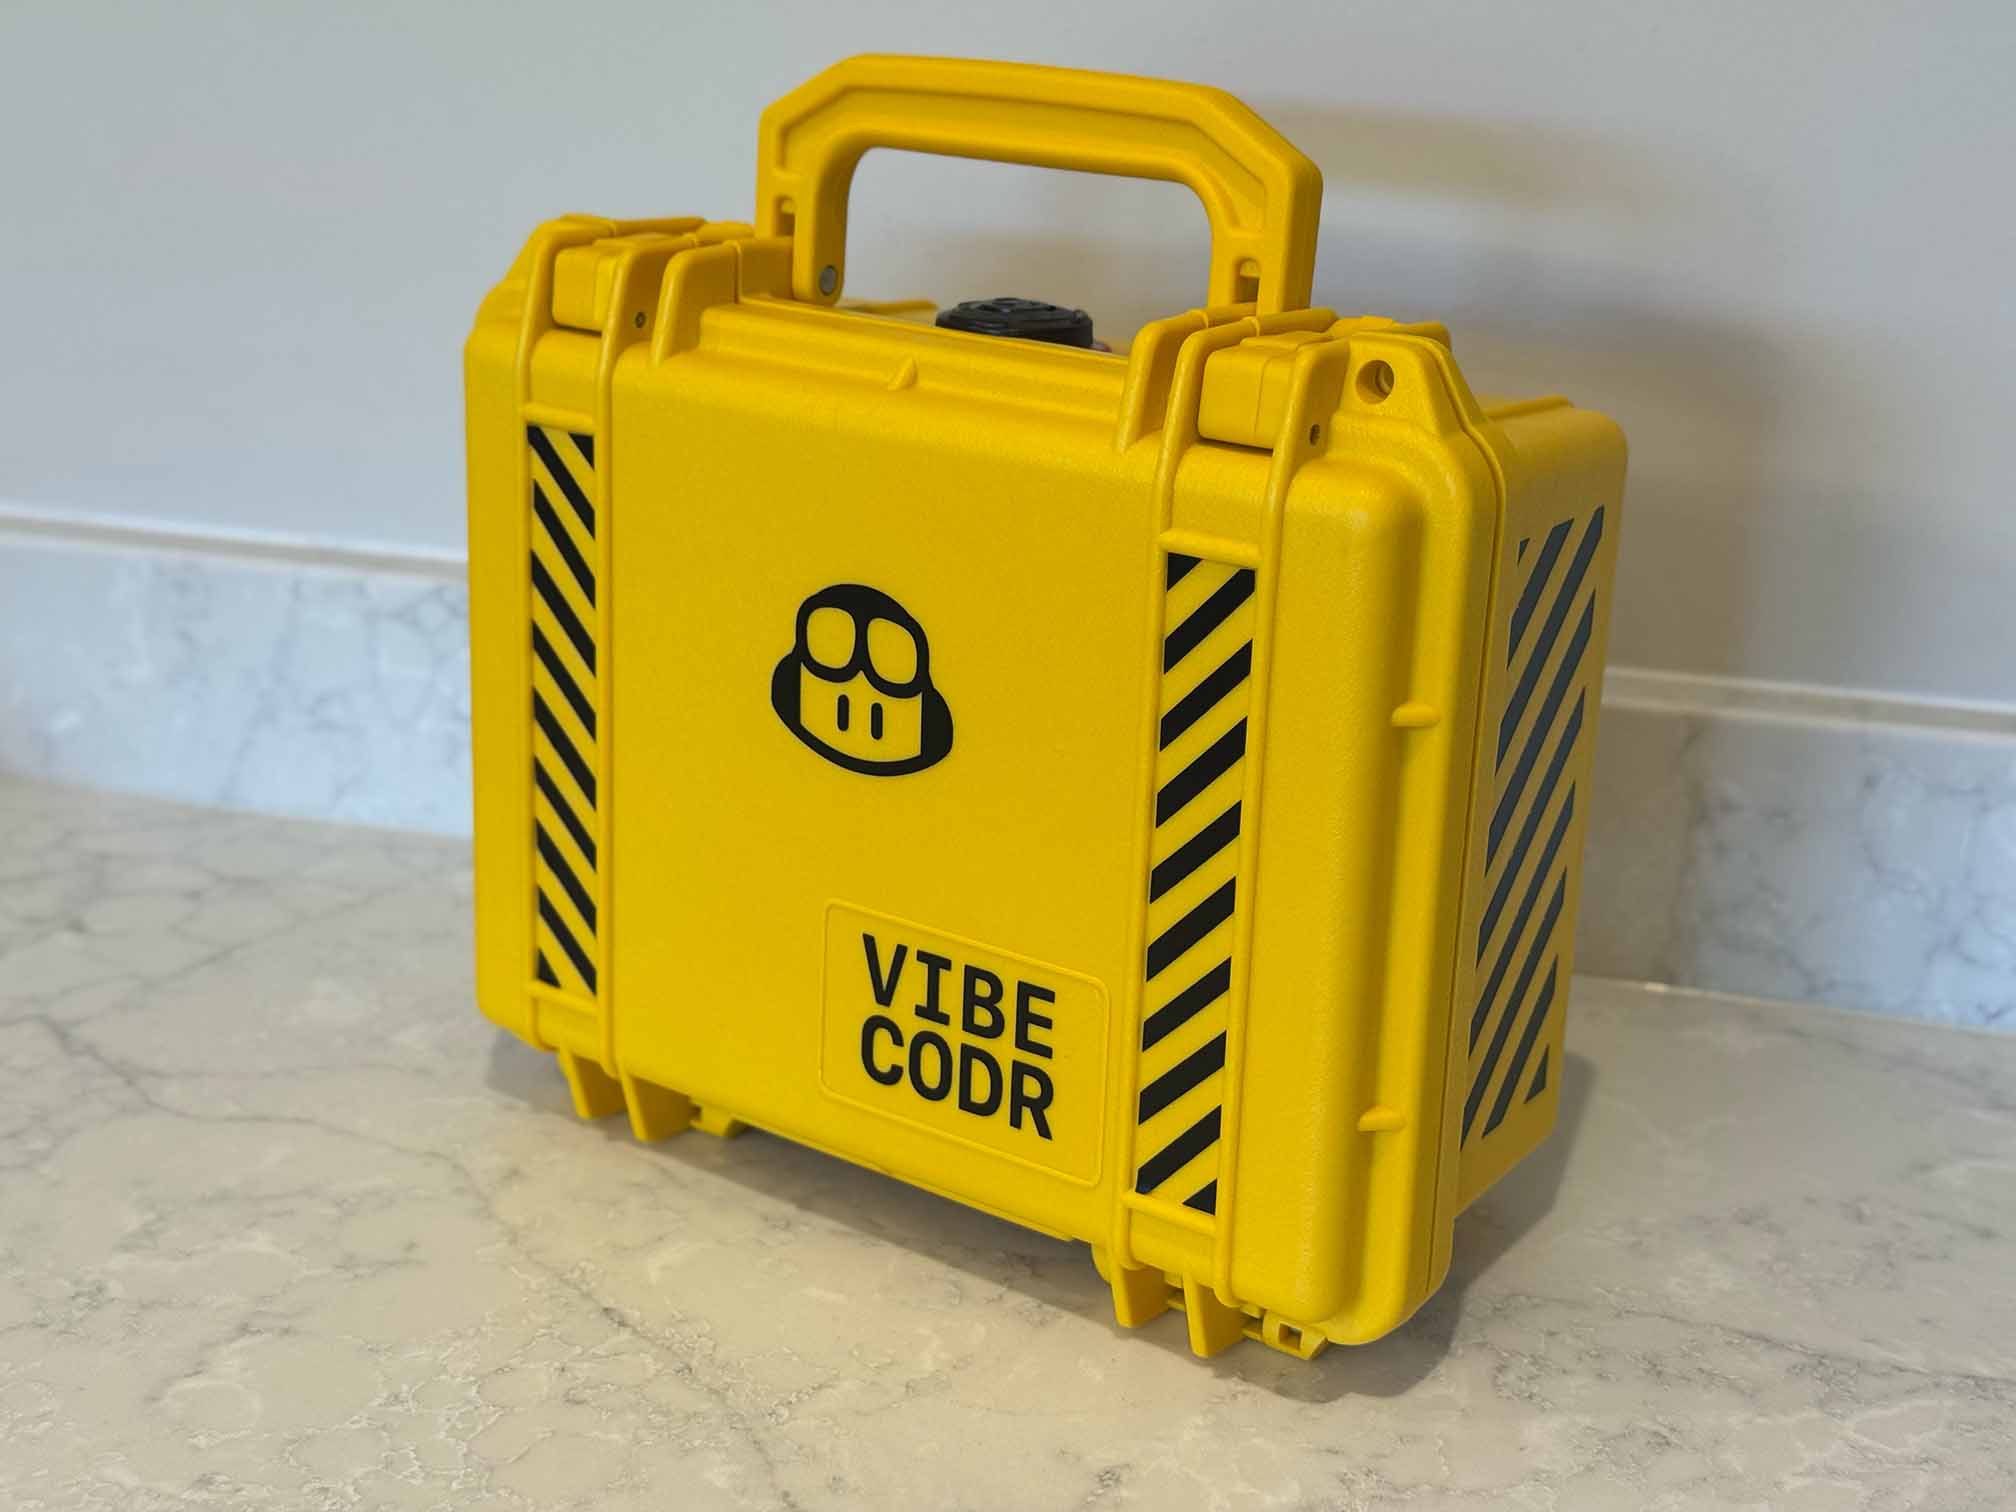
3D Print & Prep the Button Housing
I designed a simple button housing that can be 3D printed. You can find the STL files in the repo. Print the housing in black PLA or PETG for durability. You could try using a textured plate for the surface finish but I went with a carbon fiber vinyl wrap for a sleek look that really hides that this is a 3D printed part. The best thing about 3d printing this is that a single component provides all the structural support needed for the button to stand up to abuse as well as house the electronics and also give cable strain relief points to make sure this box will survive many shows.
Prepare the Button
We are first going to disassemble the 100mm push button arcade switch. Remove any micro-switch. Unscrew the button holder thead and then remove the button from it’s base and discard that - the 3D printed button housing will replace it.
Next, remove the white button with it’s spring and plunger and acrylic top from the switch body. The trickiest bit it separating the white plunger from the clear acrylic top without as it’s a snug snap-fit. A guitar pick is great for this but a flat head screwdriver can also work.
Then with the white circle on top of the plunger we can apply a Copilot decal for extra brand goodness - this should have been included with the decals for the box.
Next we need to insert the circular LED ring into the white plunger. This will provide the illumination for the button. You simply secure it into the white plunger with LOTS of hot melt glue - the more the better as the glue on top of the LED’s acts as a diffuser and helps to spread the light. Feed the wires through the hole in the button housing.
Then re-assemble the button by putting the circle on top of the plunger, the clear acrylic top on top of that, then slot back into the button housing. Then insert the button into the 3D printed housing, screw down and finally add the micro-switch in.
Wiring
Now we need to wire up the button. The Pimoroni Plasma has handy screw terminals for 5V, Ground and Data for the LED ring. For the button, solder two ends of a JST PH 2.0mm connector to the micro-switch terminals. One should be connected to +3V and the other to SDA (blue on my wires). The other end of the JST connector will plug into the Plasma board via the QT/Stemma connector as a handy way to connect the button to the Plasma board without having to permanently solder anything. You can find the pinout for the Plasma board in the documentation.
You should now have a fully assembled button, looking like this. 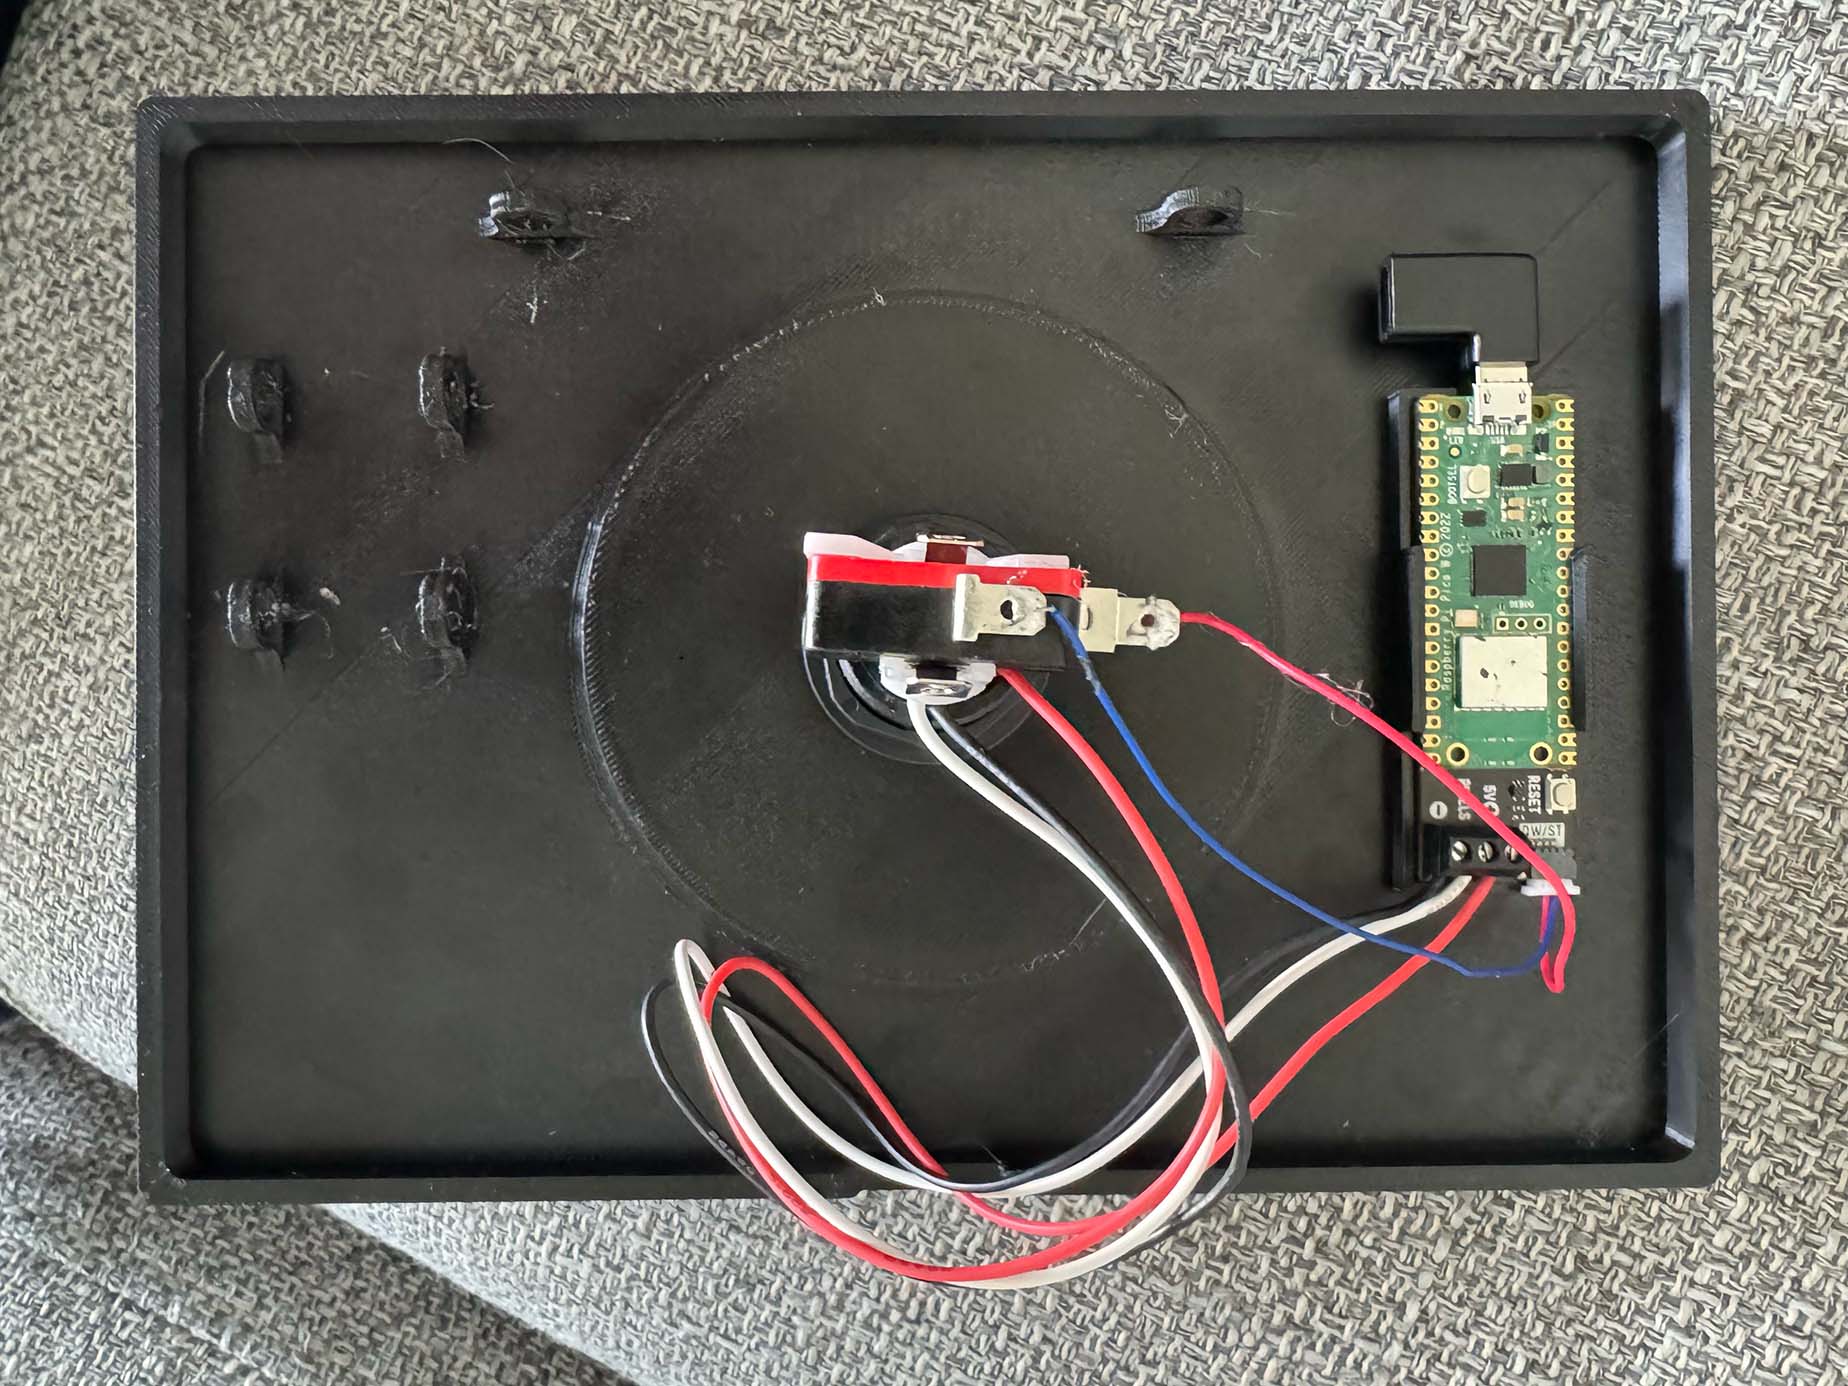
You can happily run this on any board that supports CircuitPython or even MicroPython. I just made use of the Plasma because I had a few handy and it has all the connections I needed.
Final Assembly
Finally, connect the USB C cable to the panel mount and route it through the case to the Raspberry Pi Pico board. Make sure everything is securely fastened with zip ties and that there are no loose wires and that the cable has strain relief so it doesn’t but pressure on the USB socket on the Plasma board when being transported around.
Software
I wanted to make it easy to vibe code the firmware for the VibeCodr, so I wrote it in Python using CircuitPython. This allows you to easily modify the code from VS Code straight on the device itself. But first you’ll need to install CircuitPython on the Plasma board. You can find the instructions for that here.
You can find the Python code I came up with for the VibeCodr in the repo. It’s pretty straight-forward with most of the code being the button animations. Emulating a HID Keyboard in Circuit python is super simple.
# The button is connected to GP4 (IC2 SDA)
keys = keypad.Keys((board.GP4,), value_when_pressed=True, pull=True)

# Initialize USB HID keyboard
keyboard = Keyboard(usb_hid.devices)

...

while True:
    event = keys.events.get()

    if event:
        if event.pressed:
            keyboard.press(Keycode.SPACE)
        else:
            keyboard.release(Keycode.SPACE)
End Result
Now when you plug the button into your computer, it should be recognized as a USB HID device and you can use it to send key presses.

One of the things we learnt while using the VibeCodr is the importance of feedback. The LED ring provides visual feedback when the button is pressed, which is crucial for a good user experience. But also people like to hold the button down sometimes which meant I had to add logic to the Copilot Spinner application to handle that and debounce lots of keypresses. People can really hit the button hard! So I was grateful to have made the 3D printed button housing super robust and used an arcade button for the switch.
Anyway, please do share pictures or videos with me using the #VibeCodr hashtag on social media if you see the button in the wild at events or if you decide to make your own. Or stop by and say hi at one of our events!