How to Build an Octolamp - A 3D Printed GitHub-Themed Smart Light
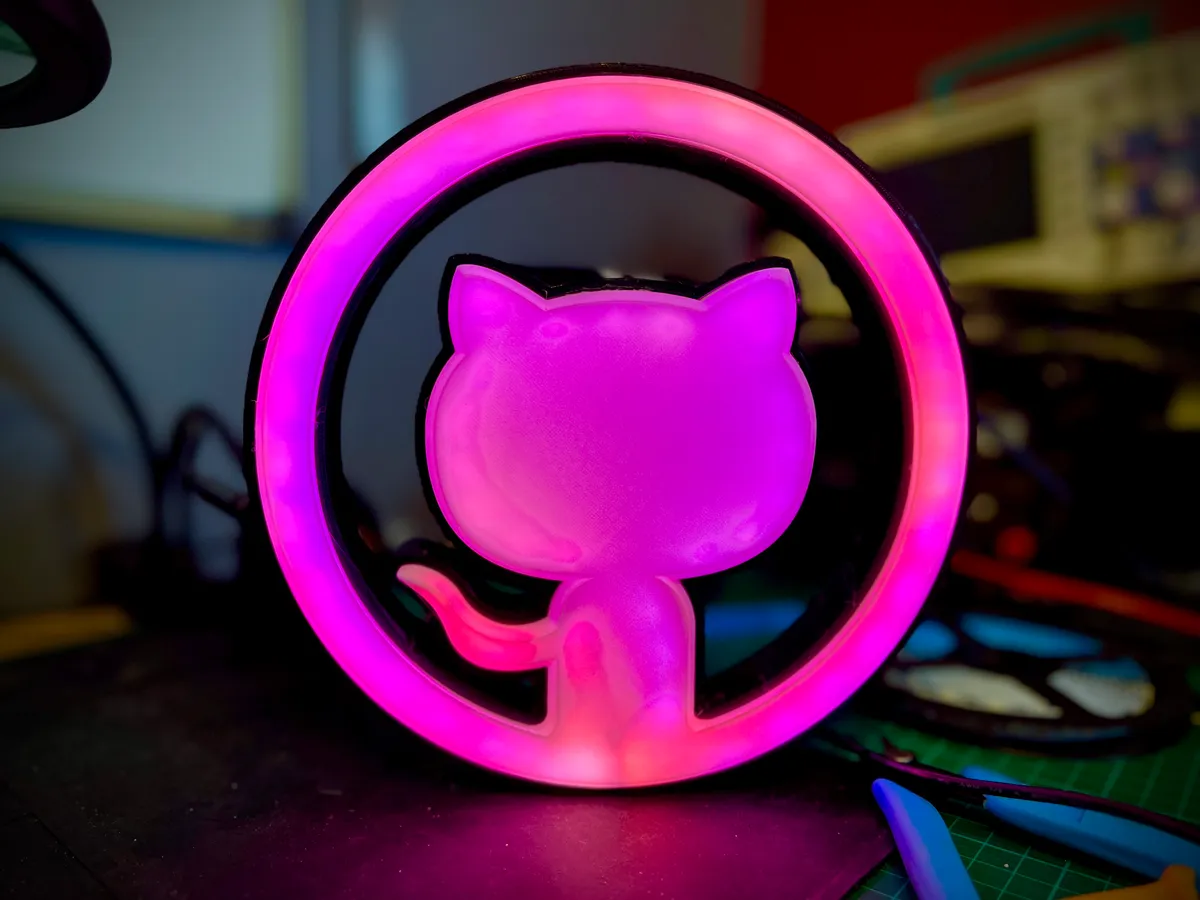
Ever wanted to bring some GitHub flair to your workspace? The Octolamp is a 3D printable, GitHub-themed smart light that combines the iconic invertocat silhouette with modern smart home technology. Powered by WLED and built around an inexpensive ESP8266 microcontroller, this lamp can be controlled from anywhere and integrated with home automation systems like Home Assistant.
What You’ll Need
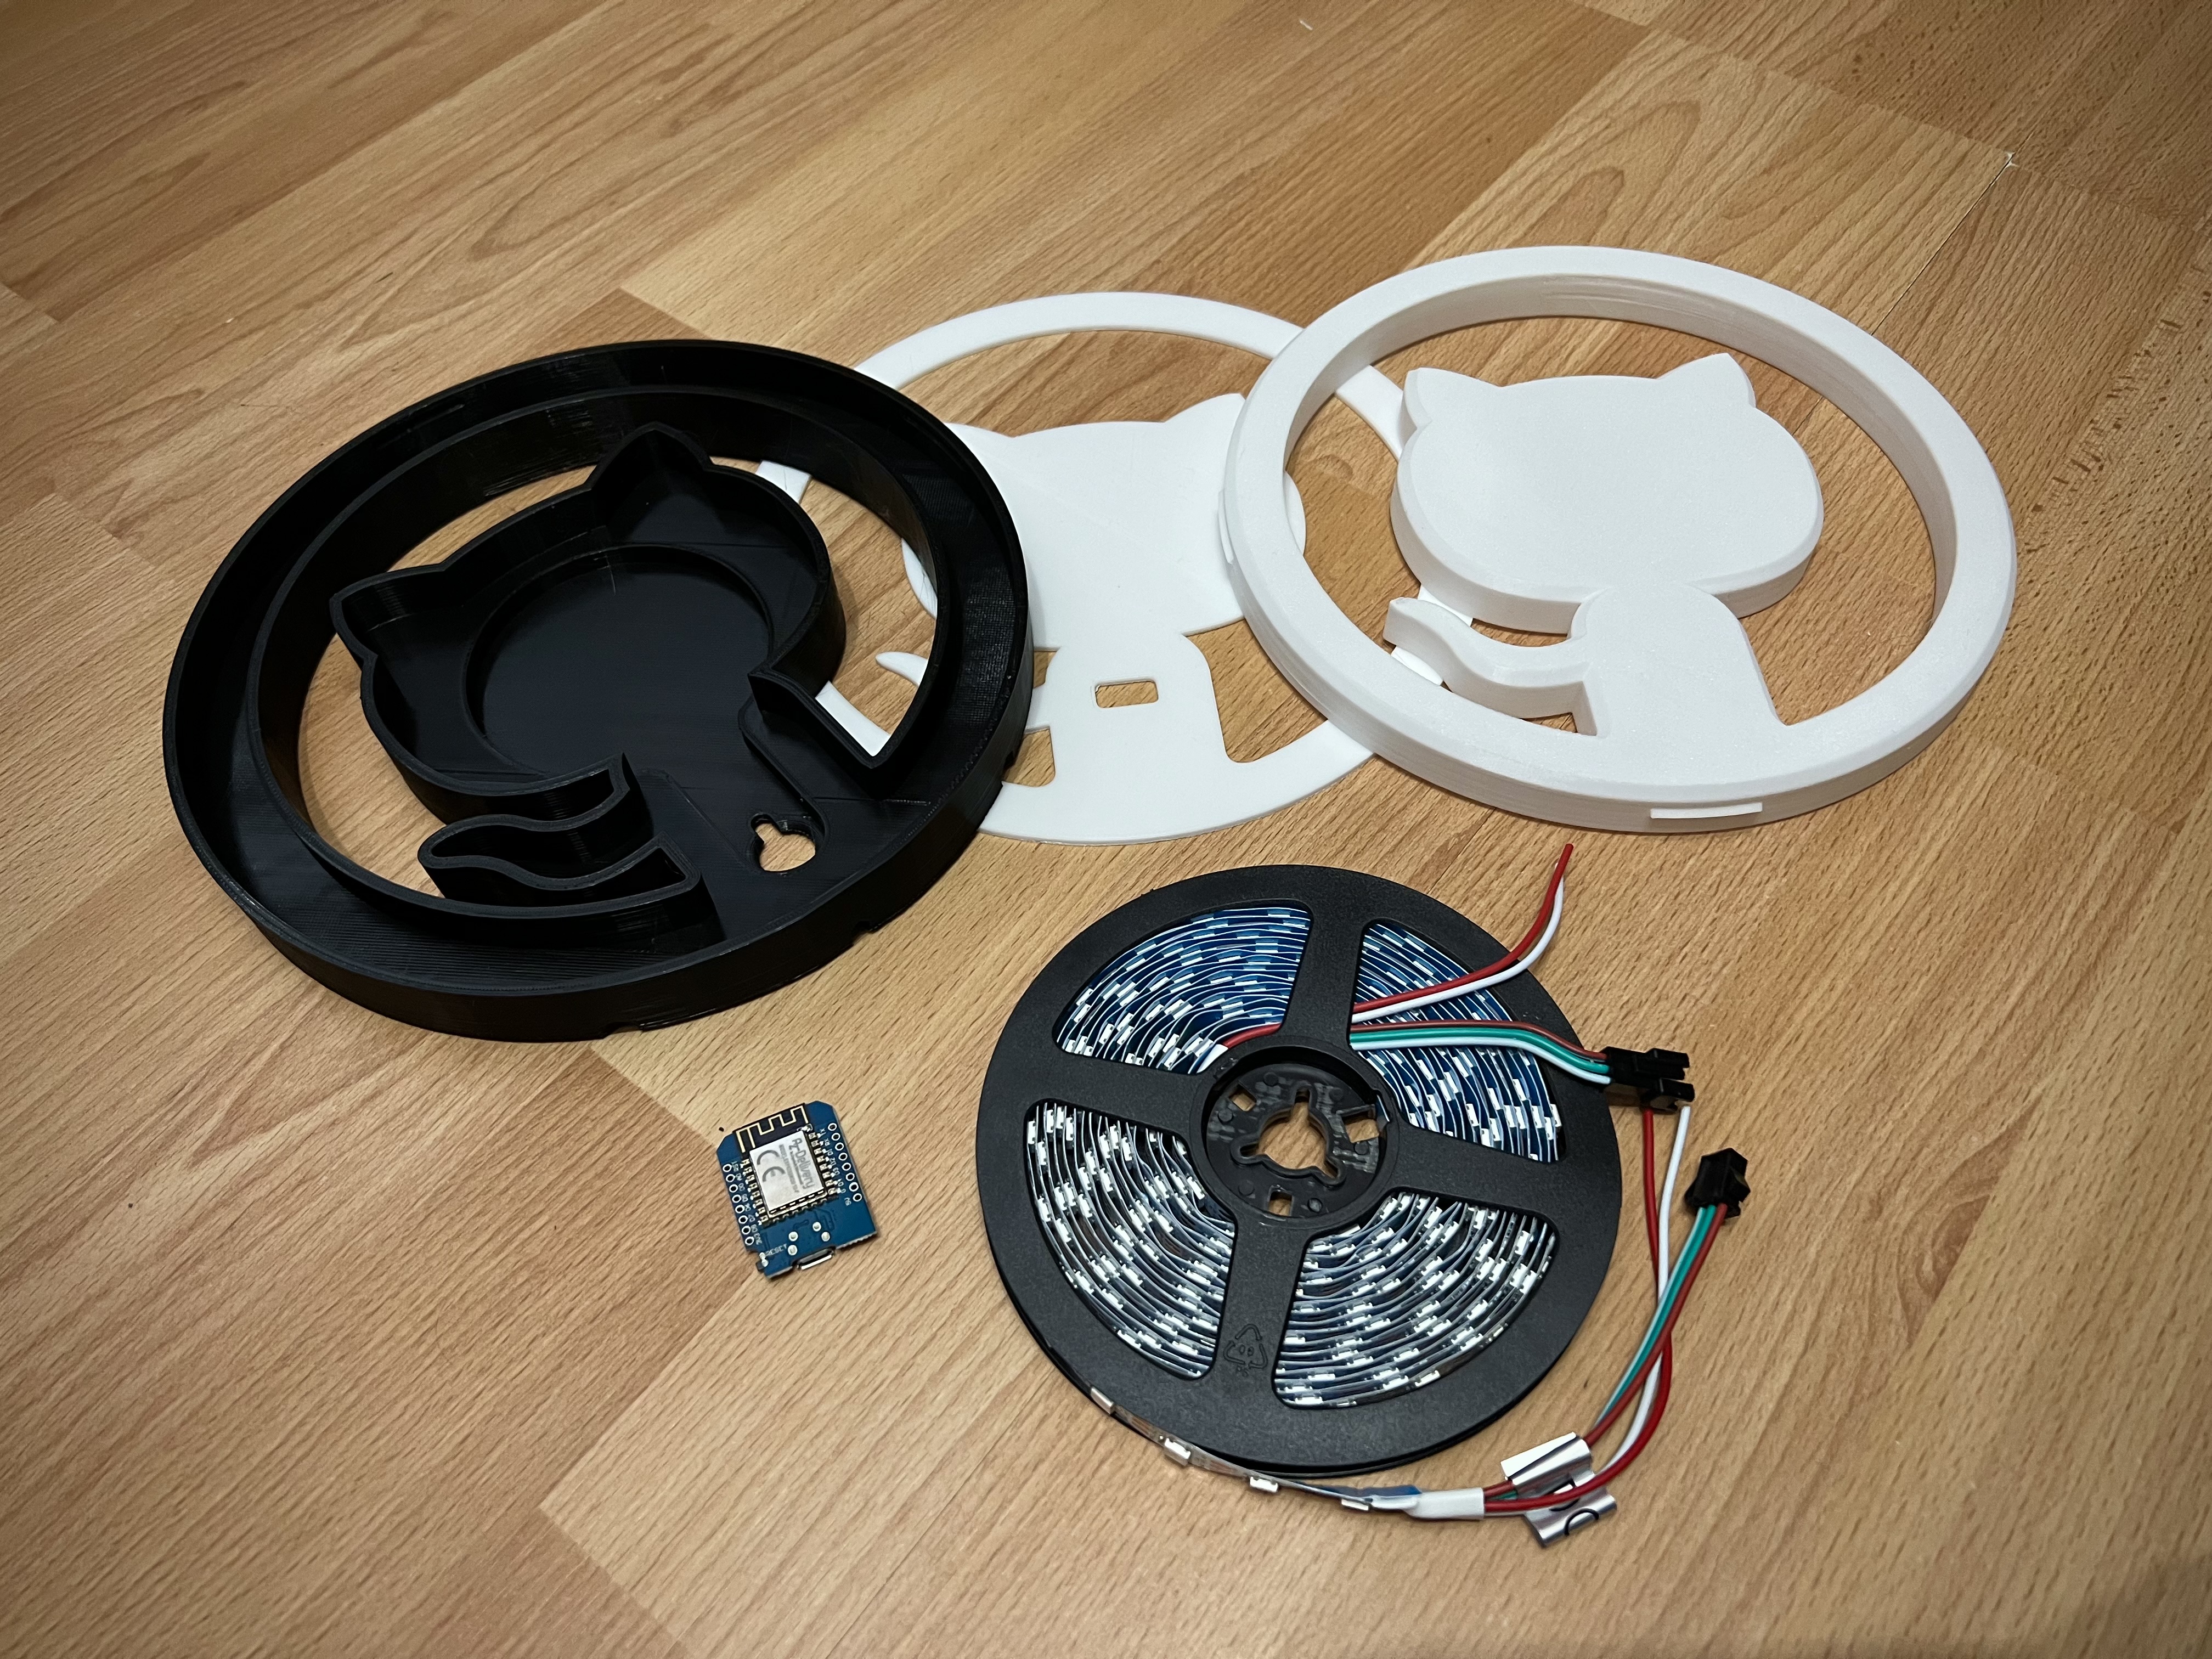
To build your own Octolamp, you’ll need access to a 3D printer, a soldering iron, and the following components:
Materials Required
- Black PLA Filament (for the base) - US | UK
- White PLA Filament (for the inner body and reflector) - US | UK
- WS2812B LED Strip (60 LEDs per meter, just under 2m worth) - US | UK
- ESP8266 NodeMCU D1 Mini Module (or similar WLED compatible device) - US | UK
- USB Cable (Micro or Type-C depending on your D1 Mini model) - US | UK
Equipment Needed
- 3D printer with at least 210mm x 210mm print bed (Ender 3 or Prusa i3 work great)
- Soldering iron and solder
- Wire strippers
- Computer for flashing firmware
Assuming you already have PLA filament and a spare USB cable, the electrical components cost less than $20 per lamp.
The 3D Printed Components
The lamp consists of three printable parts, all designed to print without supports using regular PLA. I recommend using 10% gyroid infill for optimal strength and material usage.
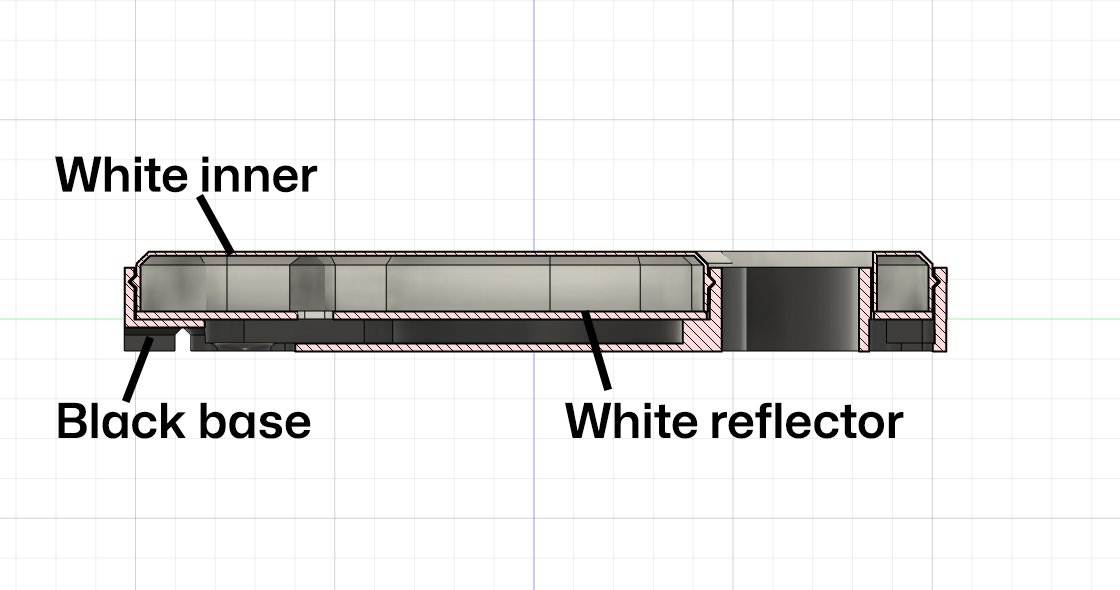
The three components are:
- Black Base - The outer housing that holds everything together
- White Reflector - Helps distribute the light evenly
- White Inner - Guides the LED strip and acts as a diffuser
When assembled, these parts snap-fit together in a clever design that secures the electronics while allowing for easy access if needed.
Step-by-Step Build Instructions
Step 1: Install WLED Firmware
Before any assembly, you’ll need to flash your D1 Mini with WLED firmware. WLED is an incredible open-source project that turns simple microcontrollers into powerful LED controllers with web interfaces, mobile apps, and home automation integration.
The easiest way to install WLED is using the web-based installer:
- Connect your D1 Mini to your computer via USB
- Visit https://install.wled.me/ in a Chrome or Edge browser
- Follow the prompts to flash the latest WLED build
- Configure the device to connect to your WiFi network
Once installed, WLED provides amazing flexibility for controlling your LED display. You can create custom animations, sync multiple devices, and even set up automations that respond to GitHub events!
Step 2: Prepare the LED Strip
The white inner component serves as both a guide for the flexible LED strip and a diffuser for even light distribution. Here’s how to install the strip:
-
Prepare the wires: You only need the +5V, Ground, and Data connections. If your strip has additional power lines, carefully snip them off or solder new wires if your strip didn’t come pre-wired.
-
Remove the adhesive backing: Peel off the plastic backing to expose the sticky surface.
-
Follow the path: Starting at the bottom middle, carefully stick the strip following this pattern:
- Loop around the outside edge
- Cross over to the inside
- Wrap around the central Octocat head area
-
Cut to size: Trim the strip at the marked cut lines when you reach the end of the path.
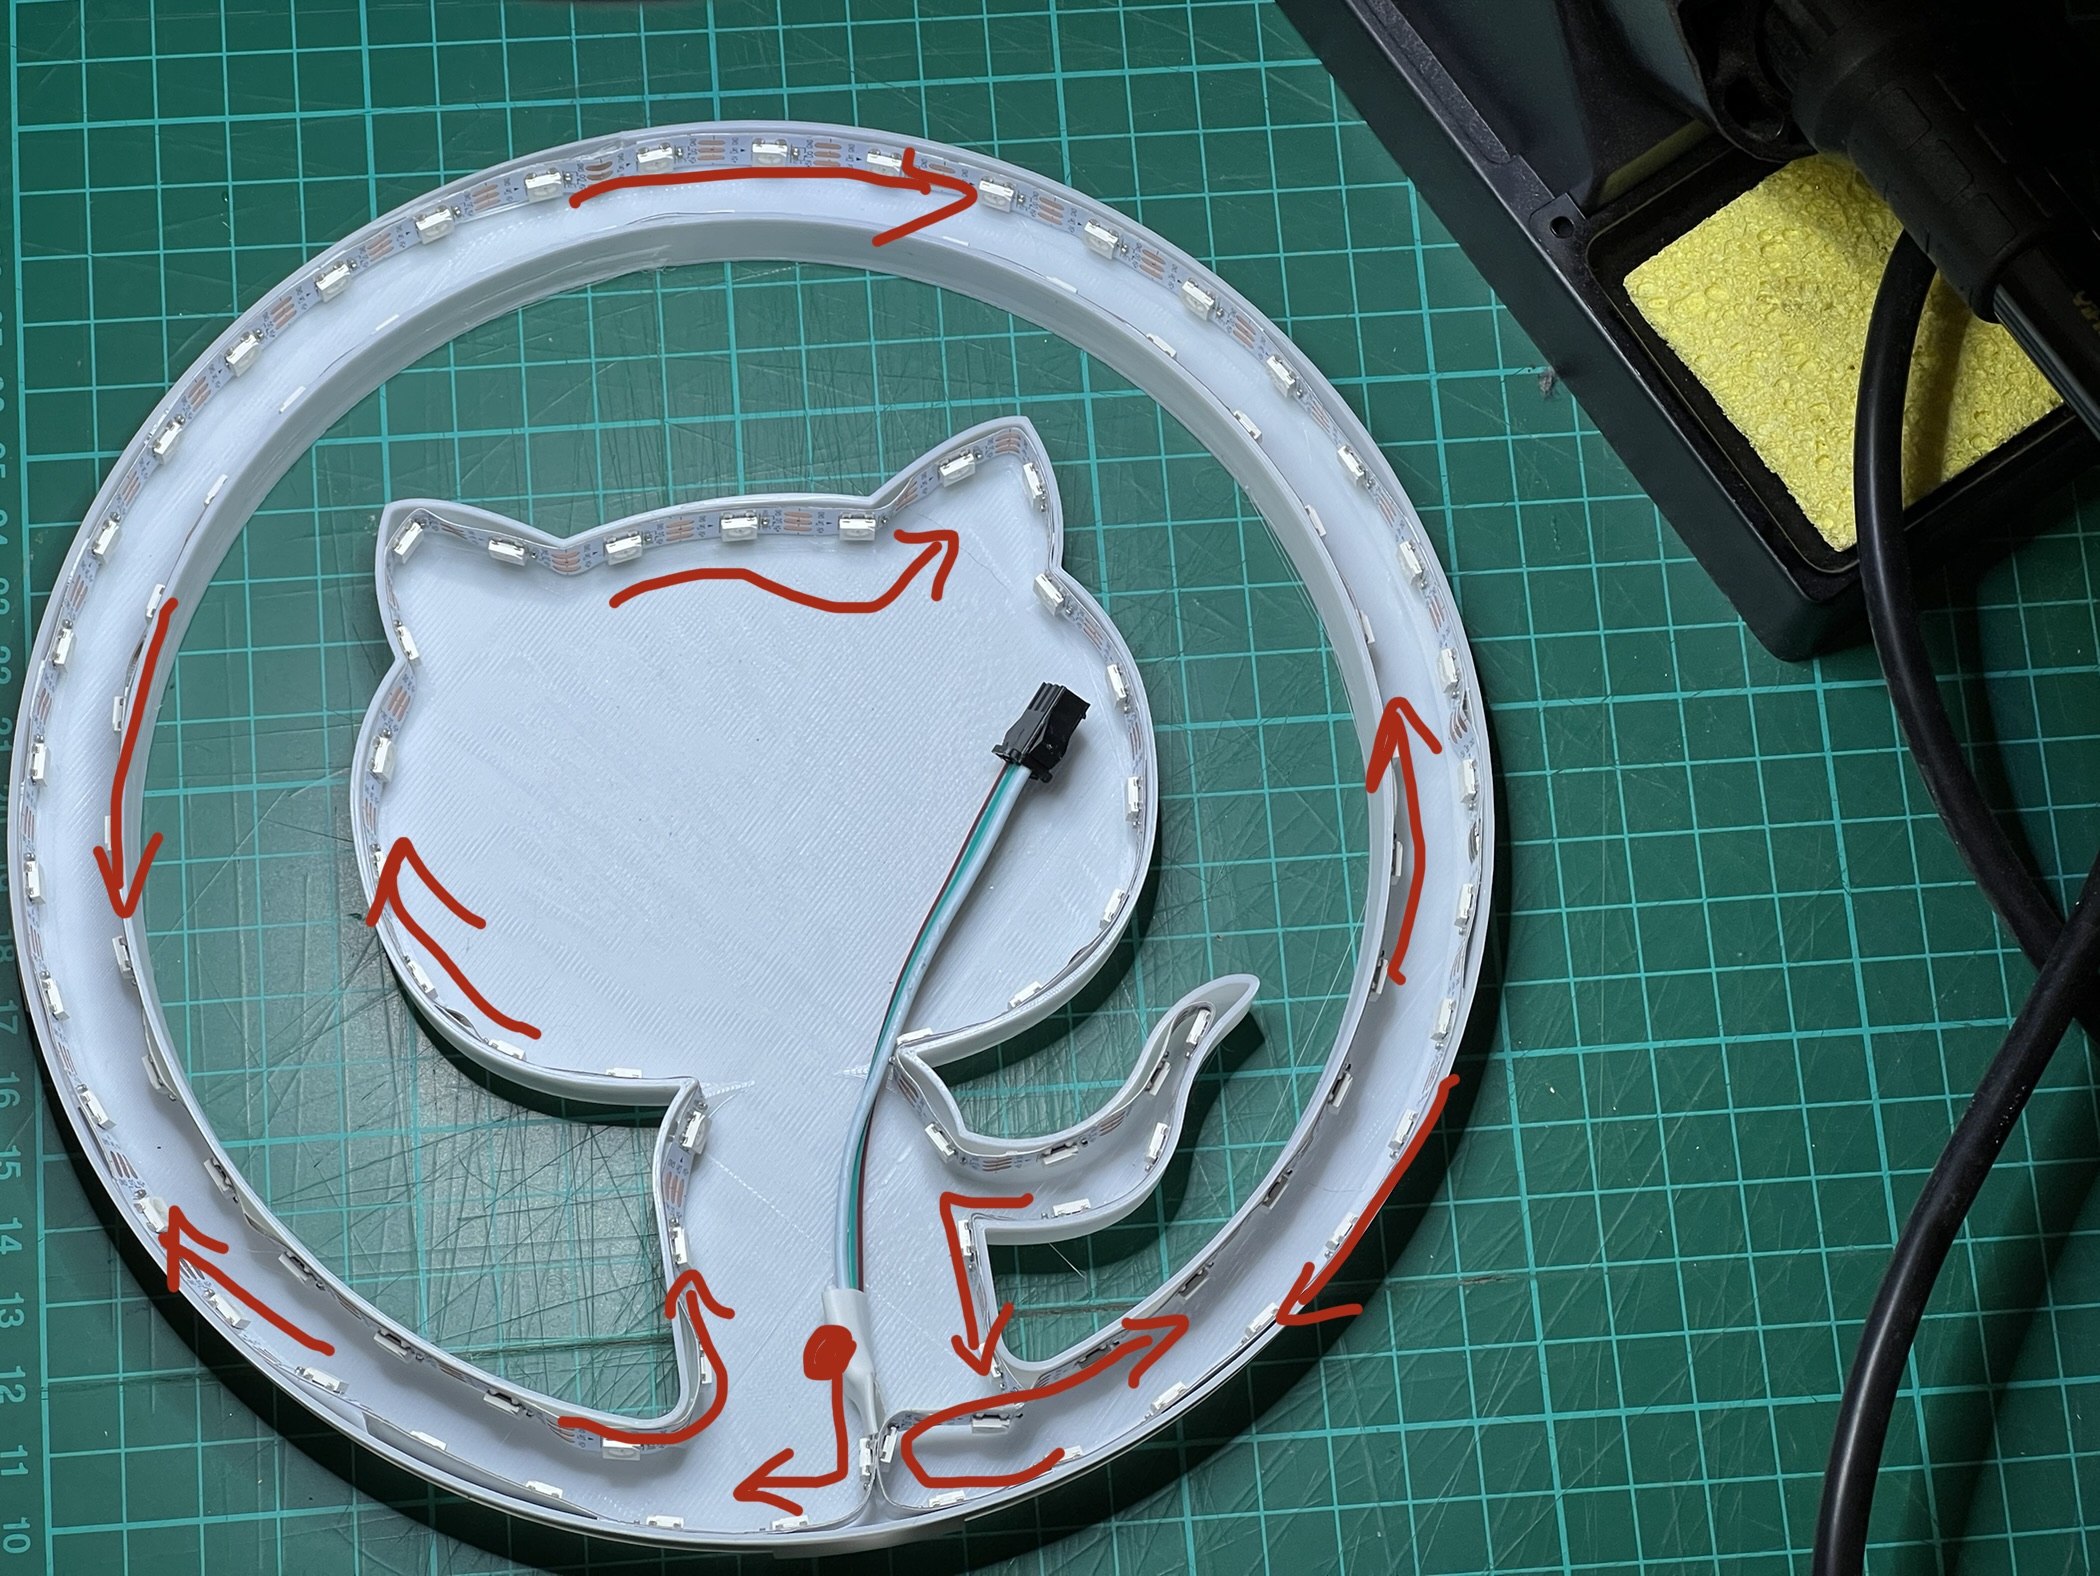
Pro tip: The central part where the strip curves from the Octocat’s body to head can be challenging. You may need some PLA-friendly adhesive to help the strip stay in place due to the reverse bend.
When finished, count your LEDs - you should have around 100 (typically between 99-105 depending on how precisely you followed the path). Make note of this exact number as you’ll need it for configuration later.
Step 3: Add the Reflector
Feed the LED strip wires through the hole in the white reflector component. If you’re using connectors, this can be done at any time, but if you’re planning to solder directly to the controller (recommended), do this step now before soldering.
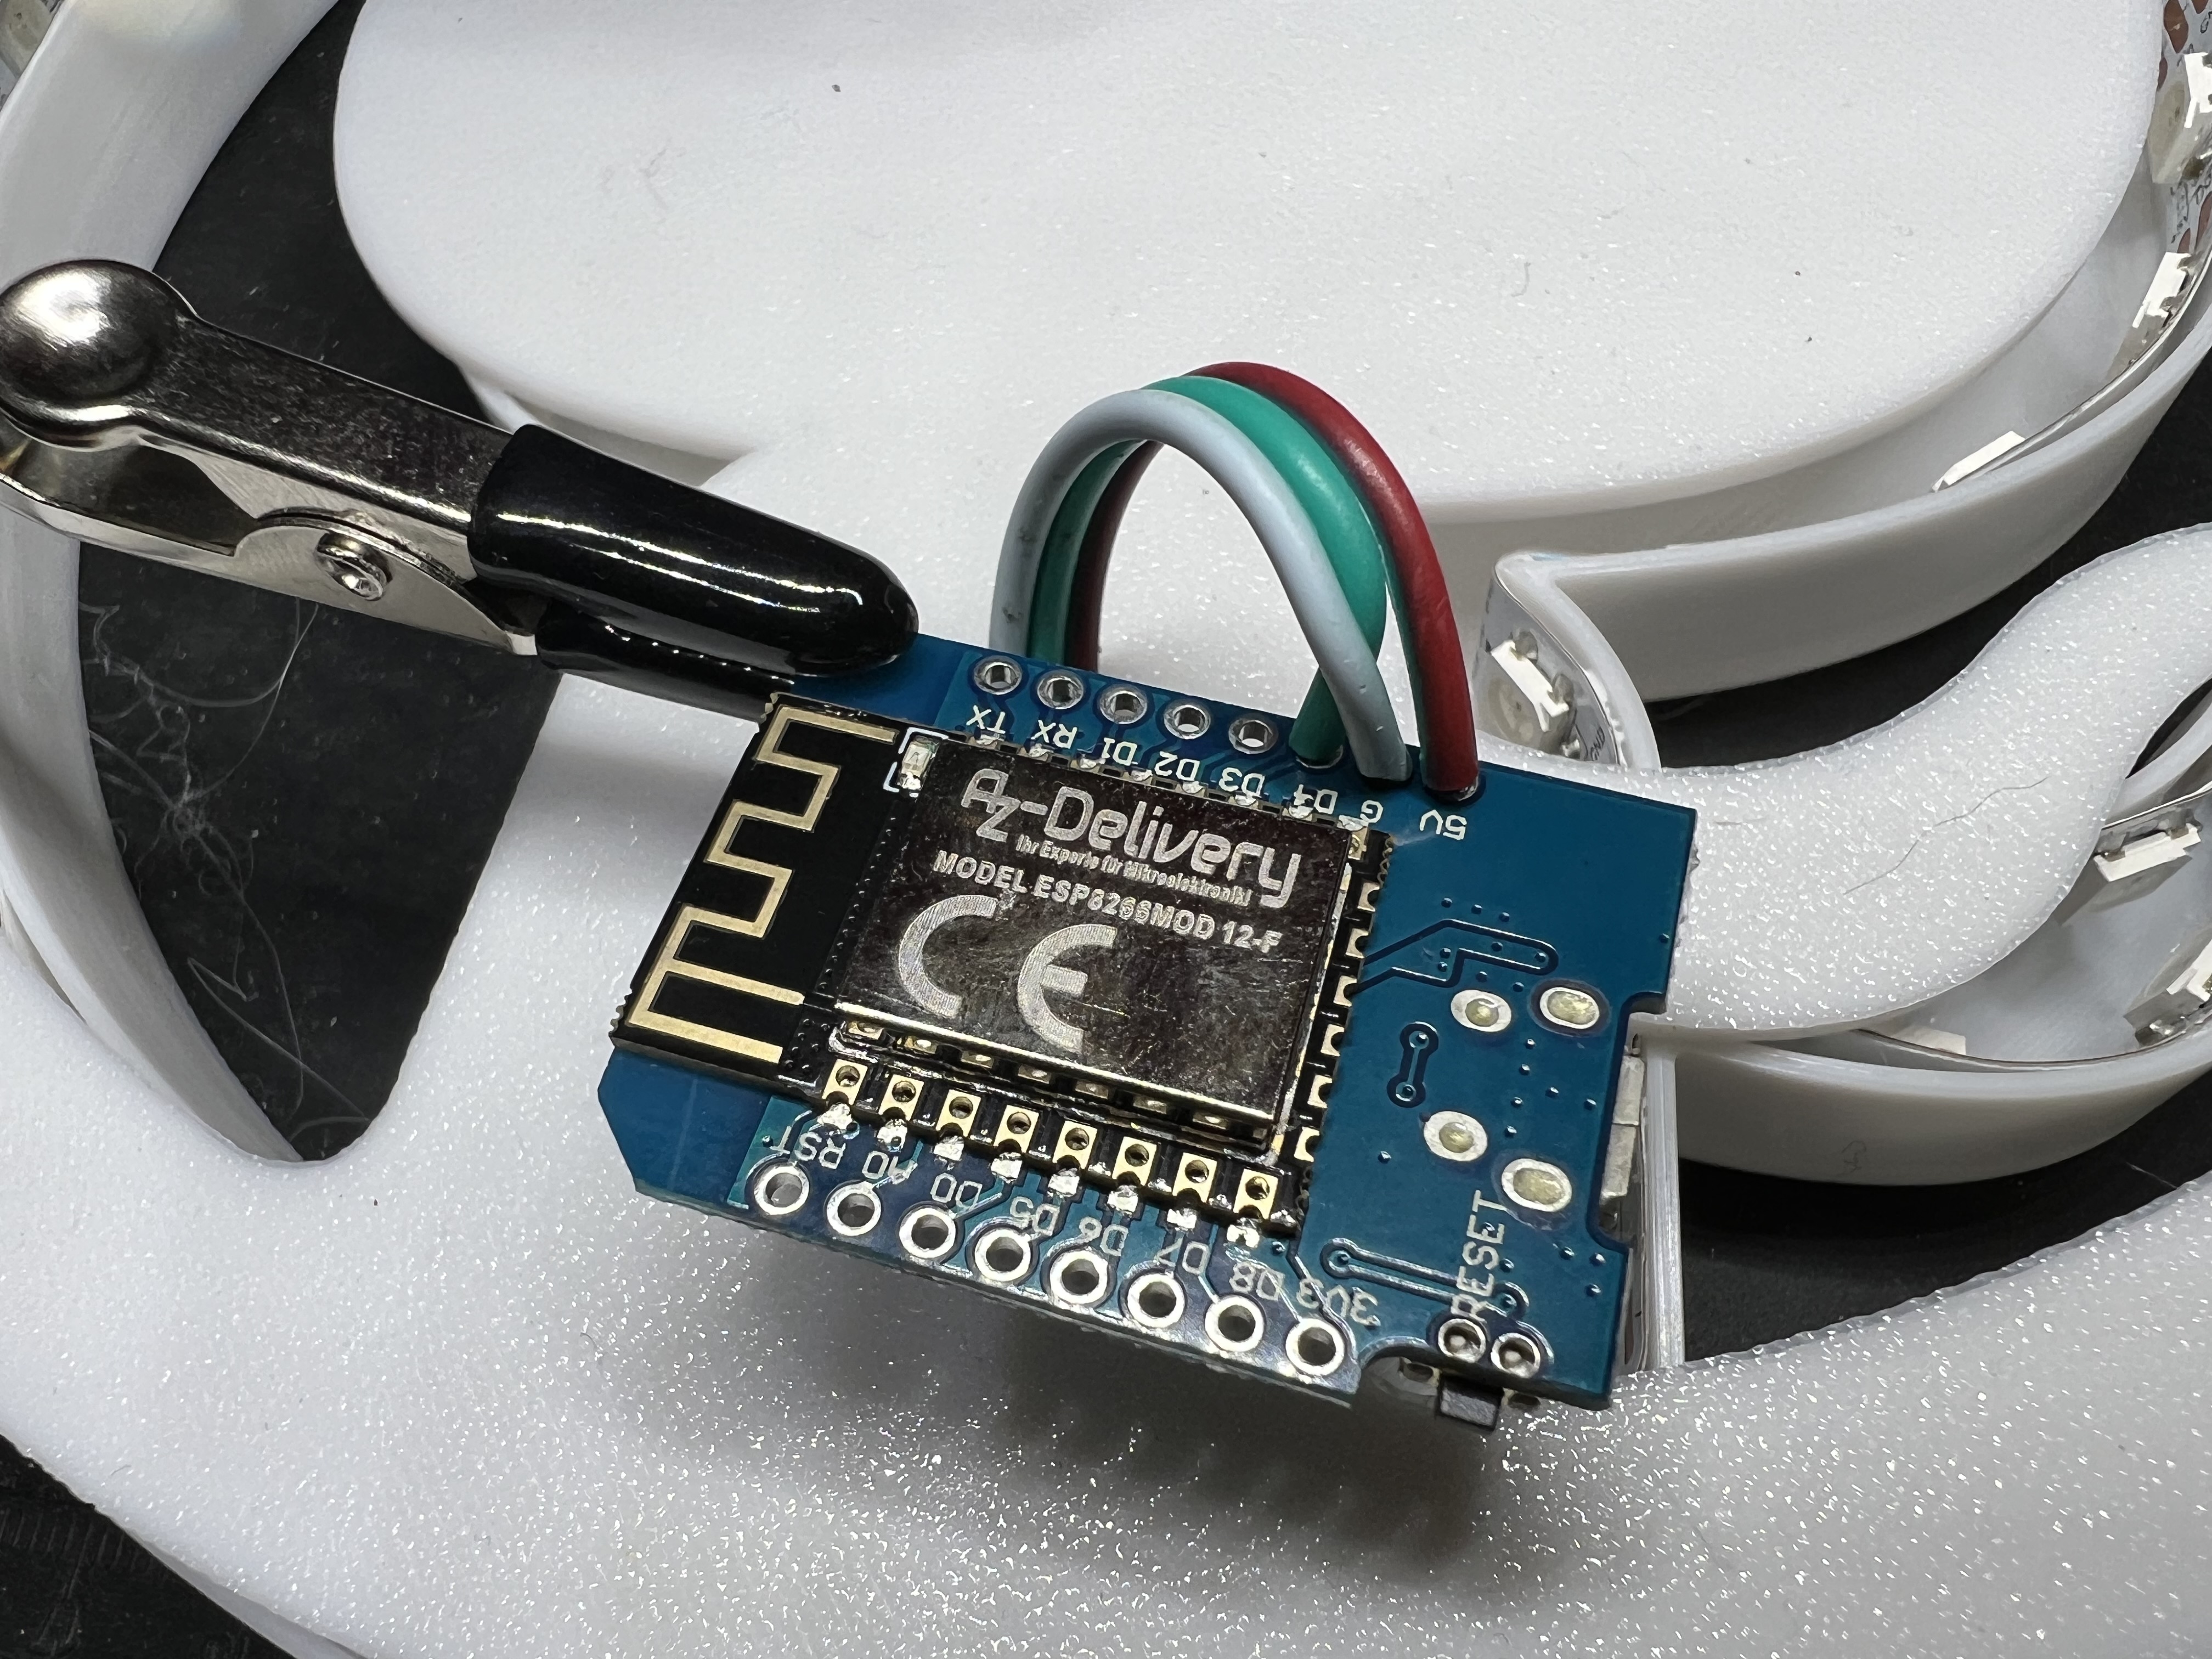
Step 4: Solder LED Strip to D1 Mini
While you can use connectors, I prefer soldering directly for a more reliable connection:
- Connect the +5V line to the 5V pin on the D1 Mini
- Connect the Ground line to the G pin
- Connect the Data line to pin D4 (located just above the 5V and G pins)
Step 5: Final Assembly
Now for the satisfying final assembly:
- Route the USB cable: Feed your USB cable through the back of the black outer housing
- Connect to controller: Plug the USB cable into your D1 Mini
- Position the controller: Place the D1 Mini in the small recessed area in the center of the lamp base
- Add the reflector: Drop the white reflector into place
- Install the inner component: Place the white inner component with attached LED strip and snap it into the black outer body
The snap-fit design forces the reflector down, which secures all the electronics in place. It’s a clever mechanical design that requires no screws or additional fasteners.
Step 6: Configure WLED
Power up your device - you should see about half your LEDs glowing orange (this is WLED’s default state).
- Connect to WLED: Open a web browser and navigate to your device’s IP address
- Configure LED count: Go to Config → LED Preferences
- Set the length: Update the “Length” field to match the exact number of LEDs you counted in Step 2
- Save settings: Click Save - now all your LEDs should light up orange
Now comes the fun part! Explore WLED’s incredible effects library. You can create:
- Smooth color transitions
- Reactive audio effects
- Custom patterns and animations
- Scheduled lighting changes
Once you find your favorite setting, save it as a preset. Then return to LED Preferences → Defaults to set which preset displays when the lamp powers on.
Step 7: Advanced Integration
This is where the Octolamp really shines. With WLED’s API and webhook support, you can create automations like:
- GitHub Integration: Flash when someone stars your repo or opens a pull request
- Build Status: Change colors based on CI/CD pipeline status
- Home Automation: Sync with your office lights or other smart home devices
- Notifications: Visual alerts for important events
Sharing Your Creation
I’d love to see your finished Octolamp! Share photos in the project discussions or tag me on social media:
- Mastodon: @martinwoodward@hachyderm.io
- Twitter: @martinwoodward
Design Notes
The Octolamp model includes several thoughtful features:
- Wall mounting options for different installation scenarios
- Multiple USB cable routing paths to suit your setup
- Tool-free assembly with snap-fit connections
- Flexible design that accommodates slight variations in component sizes
Important Legal Note
The copyright for the invertocat logo belongs to GitHub. Please see the GitHub logo usage guidelines for acceptable use. This project is intended for personal, non-commercial use only.
Get the Files
Ready to start building? Get all the design files, 3D models, and latest updates at the Octolamp GitHub repository.
Happy making! 🐙💡